

Golden ears are a myth.
As long as you have never damaged your hearing, your ears are just as good as the best mixers in the world.
In fact, they probably have worse hearing than you after years of listening to music at high volume.
So what’s holding you back? Why can’t you mix like them?
The difference is that they are better at listening.
Listening and hearing are two different things.
You have the physical ability to hear the full extent of your mixes. What you’re really lacking are the listening skills that the professionals have developed. You have to train your ears!
Over time, your listening abilities will naturally improve. EQ becomes easier, you gain the ability to instantly identify frequencies, and the finer details of compression reveal themselves.
But is there a way to get to where the pros are… faster?
You can speed up that process with frequency ear training.
Today we’re going to talk about the 3 easy steps to training your ears.
I’m guessing you’re here because you want to make your mixes sound professional. We put together a brief training that covers a totally new approach to music production. Until now, everyone has been teaching production totally backward. Just click below to watch.Get industry-quality every time (steal this framework)
But if you just want to learn about Ear Training specifically, keep reading.
Frequency Ear Training in 3 Easy Steps
There are 3 steps to train your ears.
- Learn the frequency spectrum
- Train your ears with dedicated software
- Use the Vowel Technique while mixing
Try not to do all of these at once. Focus on one step at a time.
Let’s break down each step….
Step 1 – Learn the Frequency Spectrum
I can remember when the frequency spectrum seemed very daunting.
I had no idea what 10kHz sounded like compared to 500Hz. I knew one was higher than the other – but that was about it.
To be honest, it took me years to really grasp the entire frequency spectrum!
Your goal in training your ears is to be able to hear a frequency and identify it by ear (within a reasonable margin).
I will show you how to do this in step 2 – but before you can identify frequencies, you need to understand the frequency spectrum.
“Logarithmic? What in the world is that?”
Before we go over the important frequency ranges within the range of human hearing (and how they sound), we need to briefly cover some sciency stuff.
Don’t worry. It won’t take long…
You might already know that the frequency spectrum is logarithmic, not linear.
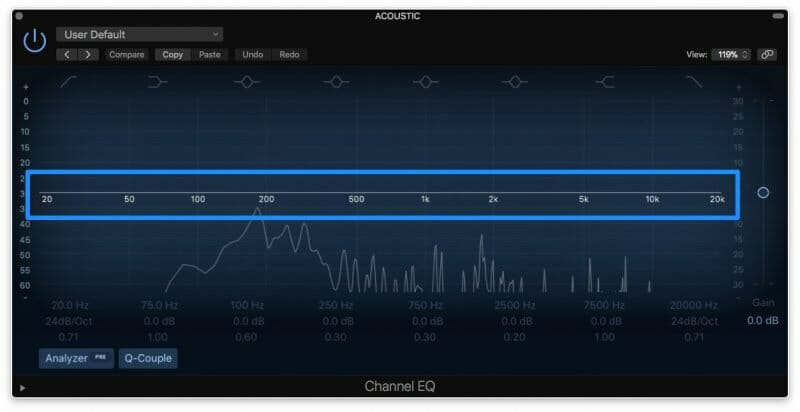
This means as the frequency increase, the gap between octaves grows. We don’t measure the range of human hearing in a linear way (more info here).
Instead of counting up in a normal fashion (10Hz, 20Hz, 30Hz, 40Hz, 50Hz etc.), we count in a ratio of 1:2 (10Hz, 20Hz, 40Hz, 80Hz, 160Hz etc.).
An octave above 100Hz is 200Hz. But an octave above 1kHz is 2kHz.
In the first case one octave is 100Hz, but in the second case one octave is 1,000Hz. That’s ten times larger!
A 100Hz difference in the low end is HUGE. But 100Hz in the top end is nothing.
100Hz and 200Hz sound very different. But 1kHz (1,000Hz) and 1.1kHz (1,100Hz) sound very similar.
How Certain Frequencies Sound
Every frequency range can be described as having a certain tonal quality.
Having the ability to pinpoint certain frequencies is great, but if you don’t know how that relates to tone, it isn’t much help.
There are five key areas of the frequency spectrum: Sub Bass, Bass, Midrange, High Mids and Highs.
I usually split the midrange down into 3 sections (Low Mids, Mids and High Mids) and the highs into 2 sections (Treble and “Air”). But, for the sake of simplicity, learn these 5 key ranges first.
You can hear the 5 key ranges below:
Next we can break down the spectrum into much smaller ranges and describe the tonal character of each range.
Study the chart below and keep it on hand when mixing. Just don’t become too reliant on it.
It will help you to learn how the various ranges within the spectrum sound. Eventually this will all come from memory.
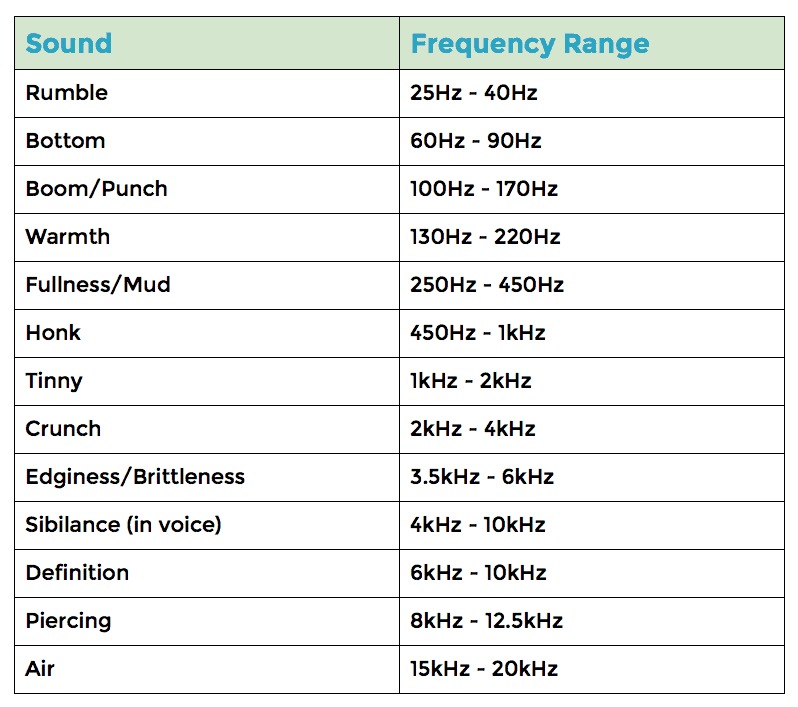
Feel free to save this image to your computer and print it. It’ll help you with your frequency ear training.
Here are some examples of different frequency ranges boosted on an electric guitar. Each example included a narrow boost of 10dB for some of the frequency ranges in the table above. I used a drastic boost to make the differences obvious.
Step 2 – Ear Training Software
Over time, you will learn how to identify different frequencies by ear through mixing. But you can significantly speed up that process through focused practice.
It’s worth the small amount of time it takes. It’s a great skill to have, as it can significantly improve the quality and speed of your mixes.
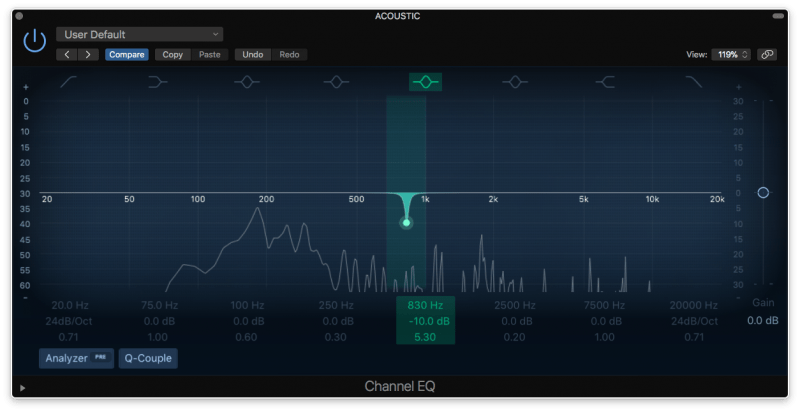
For example, if I notice a ringing on a drum, I can hear that it’s around 800Hz. It might not be exactly 800Hz, but that gives me an area to start in when I try to tame it with EQ.
If I couldn’t identify the frequency of the ringing, it would take me much longer to find it.
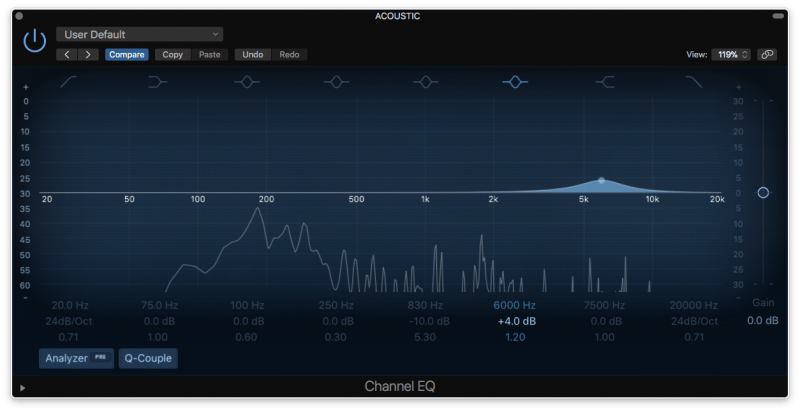
Another example – on a vocal, I might hear that the aggression of a voice is pleasing, and I want to enhance it.
Rather than using the ‘boost-and-sweep’ technique to find that element, I can instantly identify it (around 6kHz).
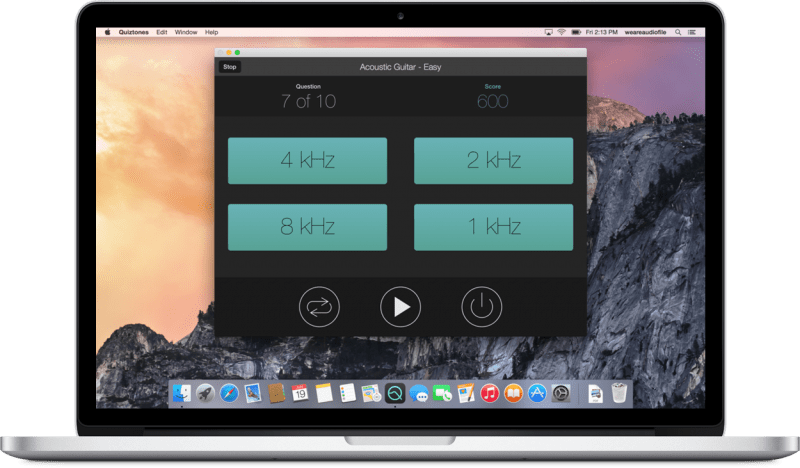
There are two ways to quickly train your ears – and I’d recommend you use both. The first is with with dedicated software.
There are many options. Some free, some paid.
Compared to the cost of a new piece of gear or a new plugin, it’s worth investing in some ear training software.
It will get you MUCH further than a new plugin ever could.
Here are some suggestions. I am not affiliated with any of these companies. These are just the best options I have found.
Free Training Exercises
Premium Frequency Ear Training Software
Step 3 – Ear Training with the Vowel Technique
The other technique to train your ears is one you can do any time you’re mixing. It’s called The Vowel Technique.
Basically, your voice can help you find problem areas in the frequency spectrum.
Stay with me here.

Without getting into the deep dark depths of formant theory, the vowel technique is based on this rule: when your voice produces vowel sounds, it’s actually creating energy in a specific area of the frequency spectrum.
You can use these vowel sounds to determine what part of the frequency spectrum needs to be turned down to balance the sound. And over time, you’ll train your ears to do the same.
Here’s the chart. For the full effect, whisper each word as airily as you can and hold out the first vowel sound.
Frequency |
Word |
| 250Hz | Boot |
| 500Hz | Tow |
| 1kHz | Father |
| 2kHz | Bet |
| 4kHz | Beet |
| 6kHz | Kiss* |
*For the last word, hold the “ss” sound, not the vowel.
We’re whispering the vowel because it spreads out the frequencies across that particular area, making it easier to compare it to your mix. Think of it as turning your voice into white noise.
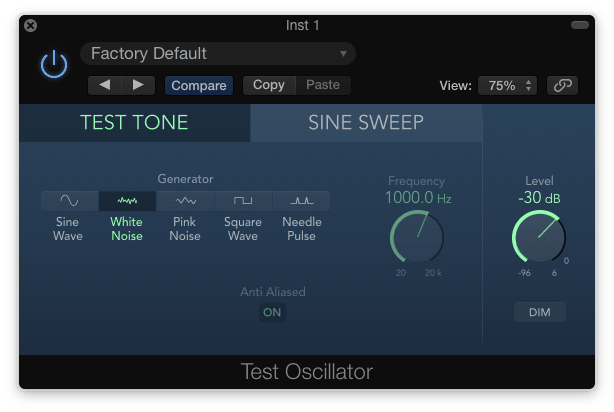
If you want to test this technique out for yourself, open up your DAW and bring up a white noise generator. Most DAWs have these, but if yours doesn’t, there are several you can download from the internet for free.
Next, bring up an EQ. Set one of the bands to a Q of 2 and boost it as high as it will go.
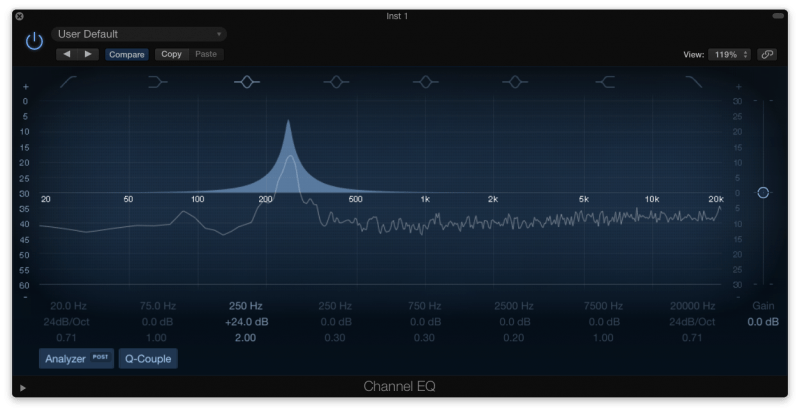
Put the band at 250Hz, then hold your whispered “boot.” Can you hear how similar they sound?
Next put the band at 500Hz, and hold your whispered “tow.”
Keep doing this for all of the vowel sounds. You’ll realize how similar they are!
This is a STELLAR system for figuring out problem areas in your instruments. It helps you to mix faster while staying accurate.
All you have to do is whisper these words one-by-one, then stop at the word that has the frequency you’re looking for. Then grab an EQ, and look around that area for some of the nasty sounds.
But more importantly, it helps to train your ears. If you do this with each instrument you’re EQing, you learn to predict which vowel is going to be the problem area.
Which means that, over time, The Vowel Technique will become obsolete. You’ll have internalized it!
Make sure to use both of these systems, and you’ll be on your way to having ears like the pros.
Conclusion: Frequency Ear Training
Spending time on your listening skills is an important step in becoming a better mixer.
Even if you only set aside an hour a week, it shouldn’t take too long to really develop your abilities.
You will see a significant improvement in both your mixes and your enjoyment in mixing.
If you want to dig deeper into music production and learn what it actually takes to make mixes that sound pro… And you’re an intermediate or advanced producer… Be sure to check out the free masterclass: Enjoy!Next Steps


