


Many people underestimate the importance of the electric guitar in a mix.
They can make your mix thick, powerful, and exciting. When mixed properly, they add a great deal of emotion to the song.
But when they’re mixed wrong, they can take up a ton of space. Rather than making a song more emotional, they can make it blander. More flat. More muddy.
This is especially true if you have several guitar tracks happening at once. It’s easy to have too many passengers crowding the train car!
To help you avoid all of these problems, here are 7 tips for mixing guitars that you can use today to make your mixes sound separate, clear, and exciting.
I’m guessing you’re here because you want to make your mixes sound professional. We put together a brief training that covers a totally new approach to music production. Until now, everyone has been teaching production totally backward. Just click below to watch.Get industry-quality every time (steal this framework)
But if you just want to learn about Mixing Guitar specifically, keep reading.
Guitar Mixing Tip #1: Never Solo.
Never. Never ever.
A common misconception is that an instrument has to sound beautiful by itself to sound beautiful in a mix. Makes logical sense, right? Why would something that sounds bad on its own make a mix better?
But that’s not actually how it works.
Think of it like cooking a dish. On their own, the ingredients might not taste that special. But when combined in just the right way, they enhance each other’s flavors.
The dish is, as the old saying goes, “greater than the sum of its parts.”
A mix is the same way! It’s more important that the element you add enhances the overall mix rather than the element sounding gorgeous on its own.
Remember: your listeners are never going to hear the guitar by itself. Only you will do that. All they’ll ever hear is the song itself.
So make your mixing decisions in context of the rest of the song. Don’t solo the track and apply guitar EQ or compression by itself. It may make the instrument sound great, but it’ll bring the rest of the track down.
Now, of course, the obvious counter is this. “What if I can’t hear that instrument? I don’t want to be mixing blind.”
And you’re absolutely right to say this.
When you’re mixing guitars and you can’t hear them well…
…rather than soloing, just turn it up. When you’re done, turn it back down.
You will still be able to hear the rest of the mix, so you’ll be making the right decisions in terms of the mix. It’s the best of both worlds.
To make this easier, whenever I start a mix, I’ll put a gain plugin with a +5dB boost on each of my tracks. When I need an instrument I’m working on to be louder, I just engage that plugin. When I’m done, I bypass it again.
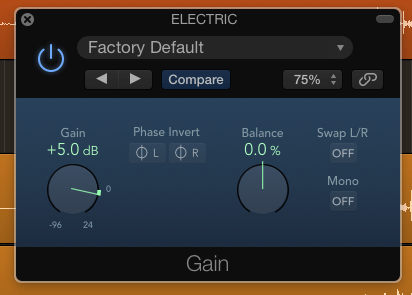
This allows you to temporarily change the volume of the track, even if you already have automation written in.
Make sure you put the gain plugin at the END of your plugin chain, though. You want your effects to stay the same once you’ve turned the volume back down. Otherwise, all those mix decisions will become pointless.
Bonus tip: Learn to use gain automation. Your mixes will sound even more consistent.
Guitar Mixing Tip #2: If You Don’t Need It, Mute It.
A lot of people get carried away with overdubbing electric guitar chords.
The thought is that they will make the guitar sound thicker and heavier. But the more you overdub, the muddier it gets.
Separation is important with guitars. Separating 5 different electric guitar parts all stacked on top of each other is a difficult task.
Truth be told, you will actually lose aggression and intensity if you record too many guitar tracks. They start to fade into each other and sound messy and undefined.
So don’t be afraid to mute extra parts if they aren’t adding anything.
This tip rings true for stereo-miked guitar parts as well. You don’t have to keep every mic! That can actually become more of a problem. Audition each mic, and get rid of the ones you don’t need.
For thick choruses, having two guitar tracks is all you need. Try panning one rhythm guitar hard left and panning another hard right.
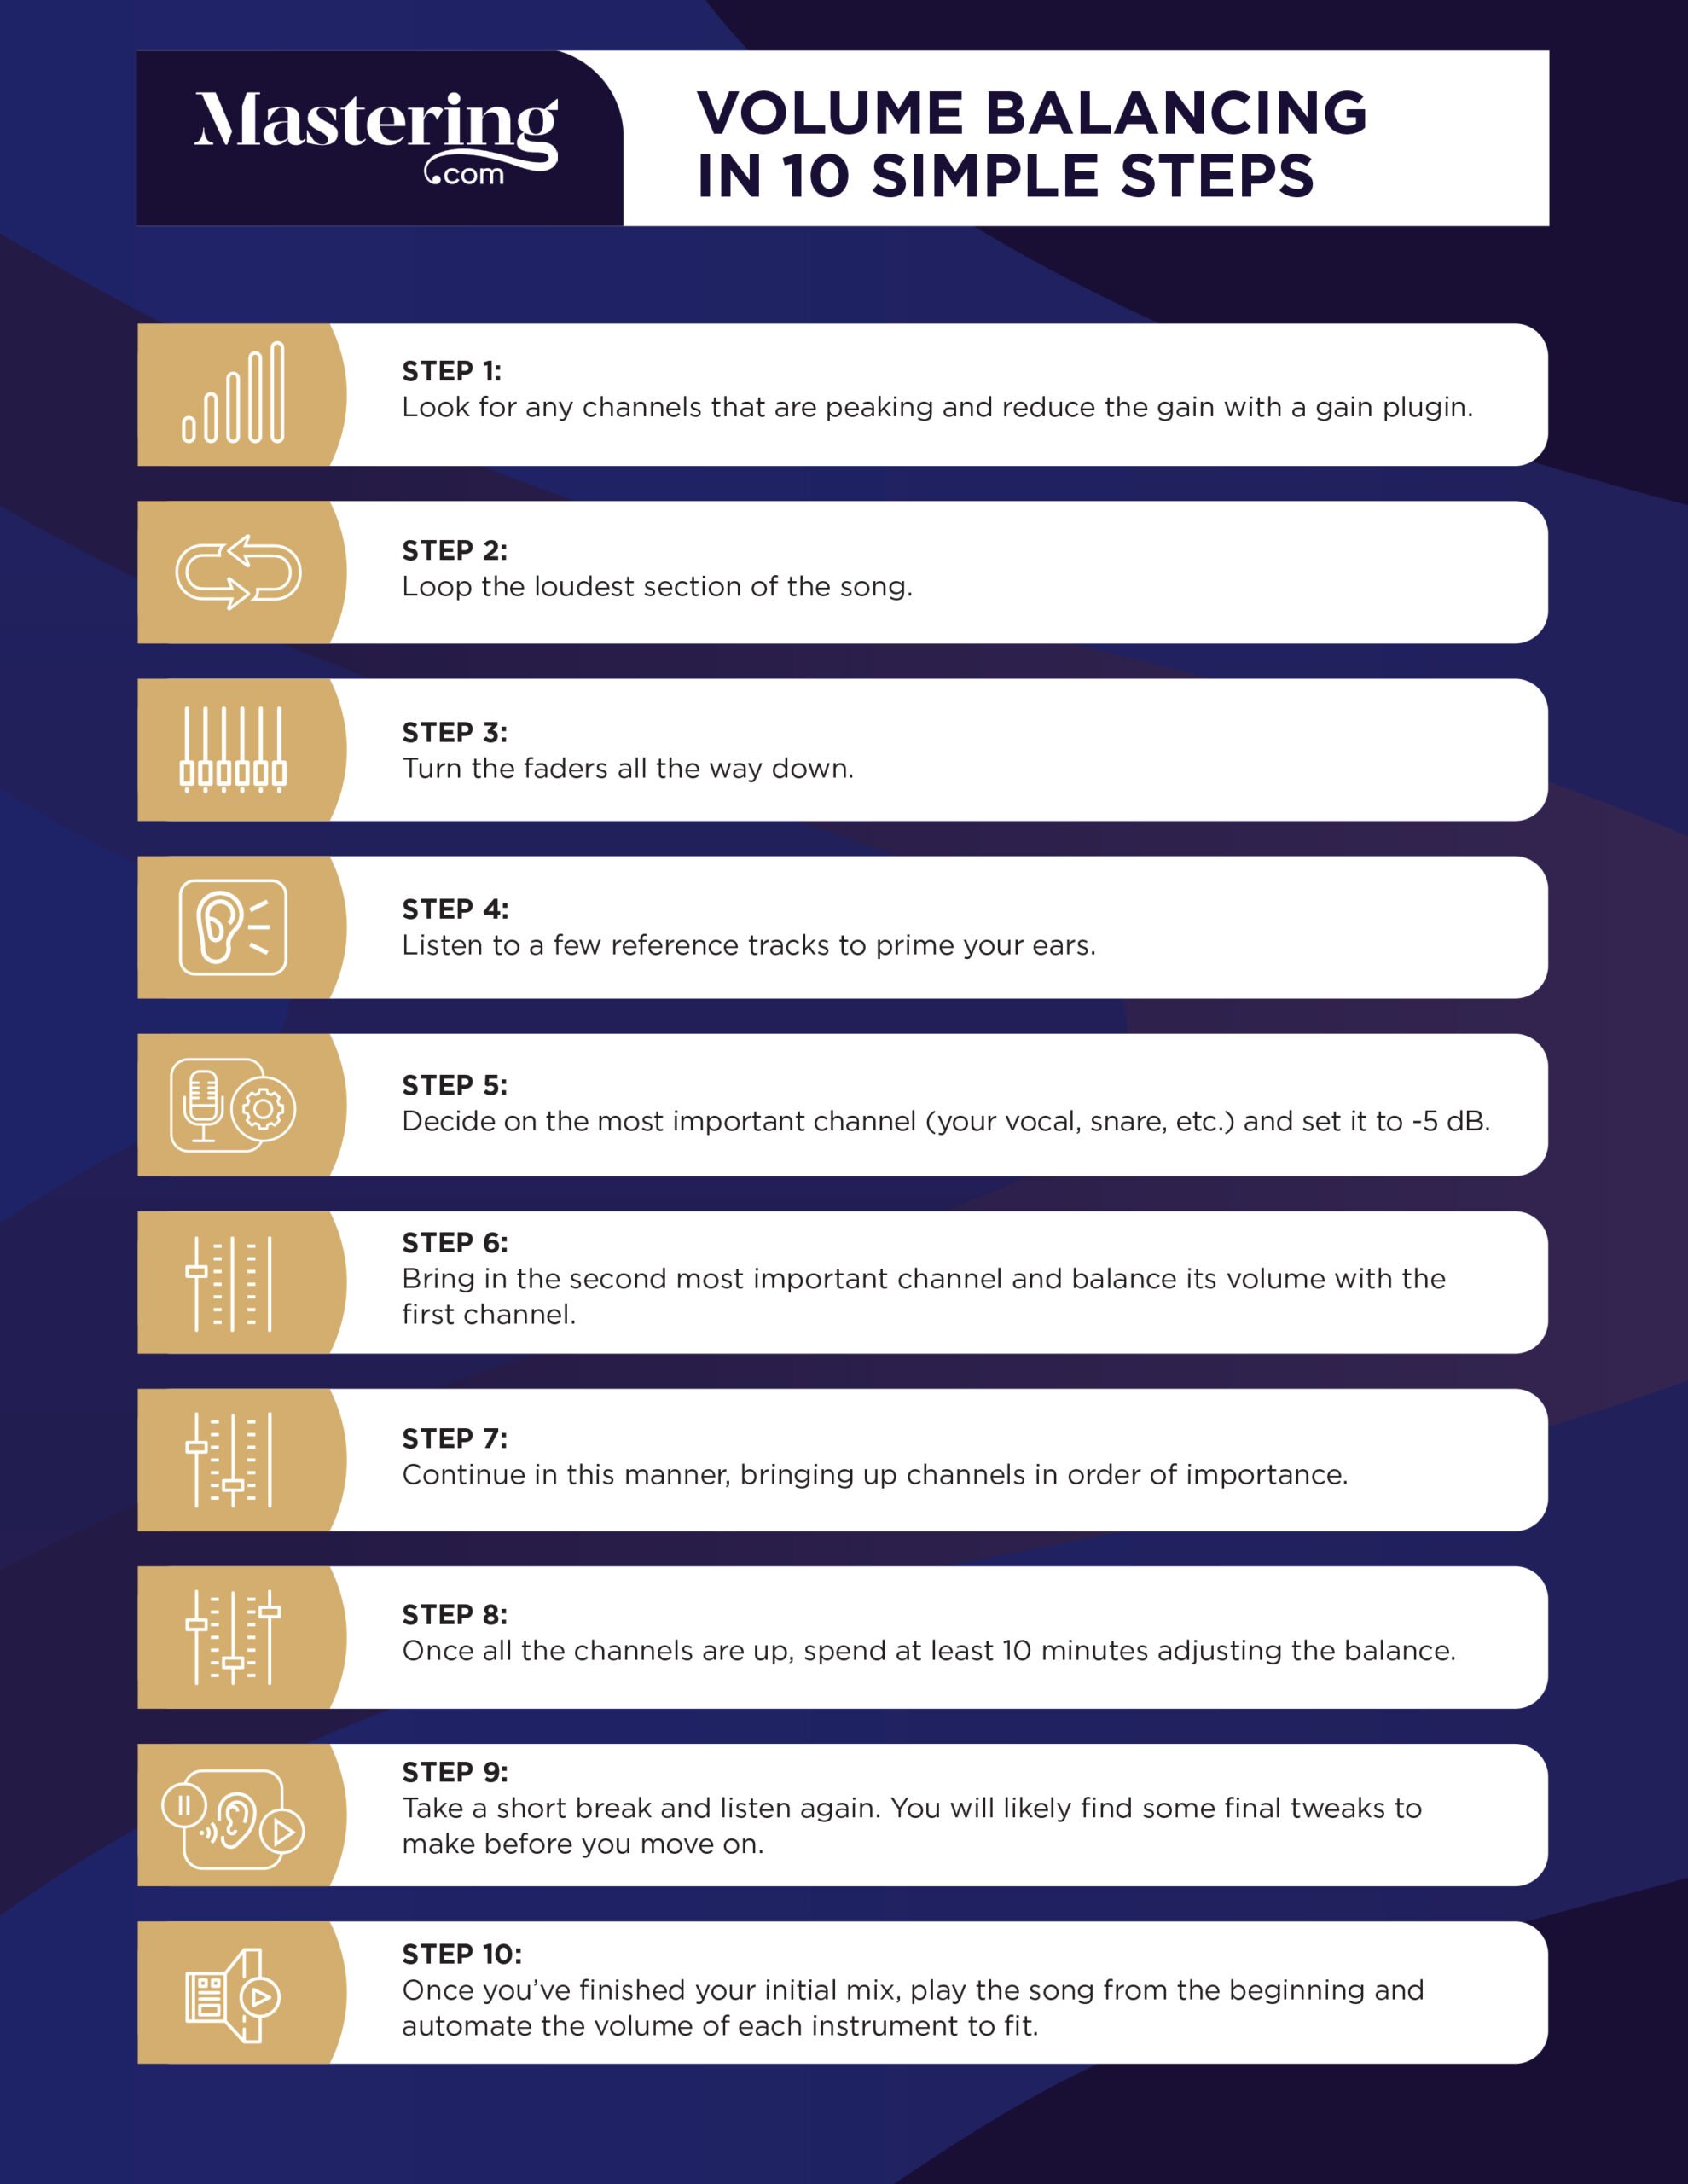
Guitar Mixing Tip #3: Balance is Key.
Before you reach for your EQ’s and compressors, get your guitars to sit well in the mix.
Back in the days before analog effects (pre-1950’s), Audio Engineers were actually called Balance Engineers. Their entire job was simply to balance the loudness of the instruments that had been recorded.
It’s the MOST important part of the mix, but it’s also the most overlooked.
Your guitars are never going to enhance the mix if they aren’t balanced with the rest of the instruments. Before you start putting on any effects, take your time to play with the volume. Find the exact spot they should be sitting. Then get started on your processing.
Even though this tip will take you more time in the short term, it will save you twice as much in the long term. Your processing will never sound good if the instrument is too loud or too soft.
Make your job easier, and be a Balance Engineer.
Guitar Mixing Tip #4: Bussing is Best.
Bussing is the 8th wonder of the world.
For those unfamiliar, bussing is when you send all of the recordings of a single instrument to one aux channel. From there, any plugin you add affects every one of those recordings.
Not only does it help “glue” your tracks together, but it massively cuts down on the amount of plugins you have to use to finish a mix.
For instance, if you have six electric guitar tracks, you would usually have to compress each one (if they need it). But with an electric guitar buss, you only have to use one compressor for the entire bunch.
This saves you on CPU, so your projects will be less likely to crash as your mix gets big. It’ll also save you massive amounts of time.
Bussing your guitars together makes you think about where you want them to sit in the frequency spectrum. Do you want them to be prominent in the low-mids? The upper-mids?
Your processing will be spread across all of your guitar tracks, so you are more likely to make a better, more intentional choice.
Guitar Mixing Tip #5: Don’t Be Afraid to Cut.
Electric guitars are like a loaf of bread.
Stay with me here…
The worst parts of any bread loaf are the heels. They’re all crust, no fluff. Chewy and sometimes even a little bitter.
I usually just throw them away after I get back from the market.
The same is true for your guitars. The ends are just unnecessary.
So throw them away.
The electric guitar is a very mid-range heavy instrument. You don’t need the low end, because the bass and kick will fill in that end of the spectrum. And you don’t need the top end, because there’s hardly any of it.
By using filters to remove the low and top ends, you are opening up space in the mix for everything else. The cymbals and vocals can shine in the top end, and the kick and bass can shine in the bottom end.
I tend to cut above 6-10 kHz, and below 80-200 Hz. The exact numbers depend on the guitar part, of course. The rule of thumb is to move your filter up until the sound starts to get weaker, then take it back just a bit.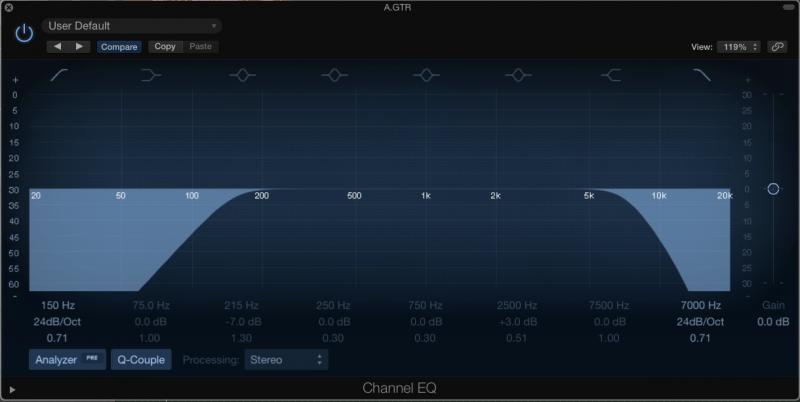
Cutting the top end gives the added benefit of pushing the guitars back in the mix, which creates depth. Our ears interpret sounds with less high frequency content as being further away. This is a great trick to use on any instrument (or effect) you are trying to push back in the mix.
It’s great to use if you have a rhythm guitar part and a lead guitar part. Cut more the top end of the rhythm guitar part, and your lead guitar will shine through.
Guitar Mixing Tip #6: Guitar EQ and Boosting the Upper-Mids
Okay, at this point we’re diving deeper into how to EQ guitar. Once you’ve cut the top and bottom end, you’re left with the meat of the guitar: the mids.
One of the most important things you can do with EQ is to pick certain areas in the frequency spectrum for each instrument, and then boost those frequencies to make the instrument “pop.”
For electric guitars, the area that tends to be the most effective is the upper mids. Check between 2kHz and 6kHz and see if anything makes the guitars naturally stick out of the mix.
This allows you to put the guitars lower in the mix without actually losing them. This will create space for other instruments.
A few words of warning:
- Again, don’t do this in solo! You want the guitars to “pop” in relation to the other instruments, not just sound better.
- The upper mids is also where the vocals tend to be the most strong. Don’t boost in an area that you have already allocated to your vocal. If your boost covers up the vocal, maybe reconsider your frequency choice.
- You don’t HAVE to boost your guitars. Don’t boost just because you think you have to. Boost because your ears tell you that you need to.
- Boosting in the upper mids carries the danger of making your guitars sound more brittle, more fragile. Sometimes, a cut near that boost will help to compensate for this.
Guitar Mixing Tip #7: Pick Your Bounds (and Don’t Overstep Them).
Range allocation will help you add separation between guitar parts.
Let’s say that you overdubbed a guitar part. Power chords, slightly distorted, panning them hard left and hard right.
Probably sounds great, right?
But as soon as your song gets summed into mono (which it will in the real world – think phones, cafe speakers, clubs), those guitars are going to sound mushy and undefined.
They don’t compliment each other, because they don’t have any separation.
To compensate for that, you can boost and cut each part at different points.
This can be done BEFORE and AFTER you’ve recorded your parts.
When tracking, make sure each new guitar part you record has a different tone. Change the tone settings on the amplifier, change the pickup selection, or even change the guitar itself.
The fact that each track will have a different frequency “fingerprint” means that that there will be better separation.
When mixing, you can use range allocation to make certain frequency areas in the two parts fit together like puzzle pieces.
BONUS GUITAR TIP: Amp Sims
 If you don’t have an amplifier to record your electric guitar, an amp simulator might be your next best choice. Technology has advanced to the point where these amp sims are pretty close to the real thing.
What we’ve covered in the guitar tips above still apply to these DI guitars. However, they have their own set of new challenges and techniques.
Here’s your rapid-fire list of tips for the best sounding amp sim possible.
1 – Use a proper DI box. An electric guitar isn’t the same as a microphone. To get the best sound, start with a DI box that you can plug into, then route it into your audio interface. For some interfaces, this is a necessity, as they don’t have a guitar cable input. For other interfaces that DO have a guitar cable input, having a DI box will improve the quality of your sound. It’s worth having at least one in the studio.
2 – Record with your actual pedals. Your guitar pedals will still sound great going into a DI box. Use the same pedal chain that you would use when performing live. Engage the effects as you usually would during the song. If you want to use virtual pedals, you can – just make sure you place them BEFORE the amp sim in your signal chain for an authentic sound.
3 – Gain stage your recordings. When it’s time to mix, use a gain plugin to turn the average level of the guitar track to -18dBFS. That’s the “digital sweet spot.” This is important, because the amount of gain going into your amp sim will determine how much it is driven.
4 – Focus on your tone controls. Don’t just throw a preset on. Make sure the tone on the amp sim fits the mix. It’s always better to fix your tone at the source than to fix it later with EQ.
5 – Use different settings for overdubs. The tip from above still applies here. Make sure your overdubs sound different to create separation between them. With an amp sim, this can be done by finding the tone you want on the lead guitar, then copying that plugin over to the rhythm guitar and changing the tone settings.
6 – Use a low pass filter. This is even more important with an amp sim. Oftentimes, digital distortion can sound unpleasant in the high frequencies. Cut the highs to avoid this.
7 – Try adding saturation. Adding some warm saturation can help to make the digital signal sound more real. I’m a fan of the “keep low” setting of the Softube Saturation Knob (which is free!). “Neutral” also works if you’re looking for a brighter tone.
8 – Create a Space. Because amp sims are digital, they don’t have the room sound that often accompanies a recording of an actual amplifier. For more modern music, this is fine. But for other, more “natural” styles, this can be problematic. To fix this, either move back the microphone position inside of the amp sim (if that feature is available), or use a short room reverb on an aux bus. The reverb shouldn’t be able to be actively heard in the mix – it’s just there to be felt. Start with the fader at zero and move it up until you can hear it, then back off a bit.
UPDATE: Check out this video on getting a BIG sound for your guitars:
Apply These Guitar Mixing Tips
Let’s summarize all the guitar tips we just discussed!
- Never use solo. Instead, just bring up the volume to hear your changes. If you do solo and it sounds bad, don’t let that put you off.
- Mute any unnecessary parts or microphones that aren’t adding to the music or the mix.
- Focus on getting the right volume balance before you start using EQ or compression.
- Do your processing on the group buss.
- Cut the lows and the highs to make room for the bass, kick, and vocals.
- Try boosting the upper mids, because that’s an ideal frequency area for the guitars to sit in.
- Focus on range allocation for your guitars, both during the recording and the mixing stage.
That’s it for mixing guitars – I hope you find this useful, and thanks for reading!
If you want to dig deeper into music production and learn what it actually takes to make mixes that sound pro… And you’re an intermediate or advanced producer… Be sure to check out the free masterclass: Enjoy!Next Steps


