


Using a compressor on your tracks is exactly like adding salt to your food! It can make everything sound better, but a little too much can completely ruin your mix.
Also, not everything requires salt.
Over-compression can be a FATAL mistake for your mix.
Today you’ll learn what over-compression sounds like and how to avoid it in your mixes.
I’m guessing you’re here because you want to make your mixes sound professional. We put together a brief training that covers a totally new approach to music production. Until now, everyone has been teaching production totally backward. Just click below to watch.Get industry-quality every time (steal this framework)
But if you just want to learn all about over-compression specifically, keep reading.
Why do we use a compressor?
Developing a strong sense of purpose for compression will help you avoid over-compression.
A compressor helps us to manipulate the dynamic range of the track. In simpler words, it helps us to control the track’s volume.
Now here’s a fact that may change your perspective about compressors.
If something is loud, we perceive it to be closer.
By letting you manipulate the dynamic range, compressors enable you to position your sound in the stereo image of the mix. You can push sounds closer or farther away from the listener.
This makes the mix more stable.
Another use of the compressor is to shape up the tone. Attack time plays an essential role during compression.
Faster attack time adds thickness to a track. But it can also cause serious damage by chopping down important transients.
Don’t get all puzzled with the term “transients.” It simply refers to the very initial part of the waveform – the “attack” of the sound. Transients have a direct influence over the “punch” of the track.
Slower attack times can help you preserve those transients and “punch.”
Combinations of these parameters (attack and release), along with your choice of compressor, define your final tone.
So far we have discussed two different uses of compressors. They can control dynamics (or volume) and control tone.
Now that we know how a compressor operates, let’s check out the signs of over-compression.
Over-Compression Sign #1: Fewer Dynamics
Dynamics have been used in music for hundreds of years to create a more evocative sound.

For example, the chorus of the song is often a bit louder than the verse. This makes the chorus sound more vivid and exciting to the listener.
Dynamic variations have a whole lot of influence on the energy and emotion of the song. Don’t overlook the importance of dynamics while using a compressor.
Over-compression usually eliminates all (or most of) the dynamics.
Loud and soft sections sound similar. The emotions embedded in the dynamic range of the music get destroyed.
The average listener might not be able to hear over-compression, but that’s not the point. The song itself will be less emotional and exciting, meaning they’ll enjoy it less—even if they don’t know why!
Over-Compression Sign #2: Lifelessness
So what does lifelessness refer to here?

Well, you get a better grasp of these mixing terms by listening more!
There’s no strict definition. Mixing engineers refer to something as lifeless when it’s not impactful enough.
Over-compression can easily suck the life out of your instruments.
But why does this happen?
Too much compression leads to the absence of “punch.” As mentioned earlier, it takes away the dynamics.
This results in a feeling of lifelessness in a mix.
Again, it’s more of a practical thing that you’ll learn with experience.
So we have looked at two signs of over-compression.
The next two signs will be more visual. We’ll be using clues from the screen.
Eyes vs. Ears
It’s a good idea to depend more on your ears than your eyes while mixing.

Professionals argue that at times meters are not completely accurate. Also, what matters in the end is whether your mix sounds good, not whether it looks good.
Still, there’s nothing wrong with using your eyes alongside your ears.
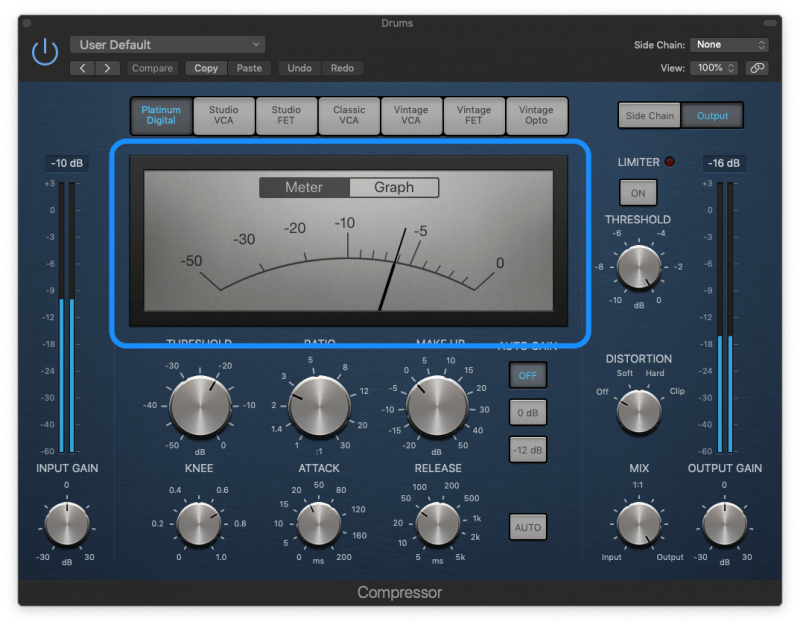
Over-Compression Sign #3: Constant Compression
Here’s a great rule of thumb by Ian Shepherd:
“The gain reduction meter should return to zero multiple times per bar.”
Make sure to keep an eye on the gain reduction meter. In most cases, if it goes above 6 dB it’s a sign of trouble.
This rule of thumb is more directed towards beginners and early intermediates. There are always exceptions to the rules of mixing.
The validity of this rule also depends on genre. For instance, you wouldn’t want your compressor to be working too hard while mixing jazz, since its a more “natural” genre.
Let’s say you are finally satisfied with your modified threshold and ratio settings. Your compressor is getting enough time to breathe and the gain reduction meter is in order. Life’s good. But you’re not so sure about the attack time.
When in doubt, it’s best to go with the slower attack time.
Why?
Well, faster attack time implies that your compressor will start working faster. That means it may clamp down on the transient peaks of the waveform.
This will bring down the “punch” of the sound, causing it to sound more lifeless.
Attack… with Caution!
You must set the attack time with precision to avoid any undesirable suppression.
Although slow attack times can save you, keeping them as your backup option is a good idea. You can’t always expect the best results with only a slow attack time.
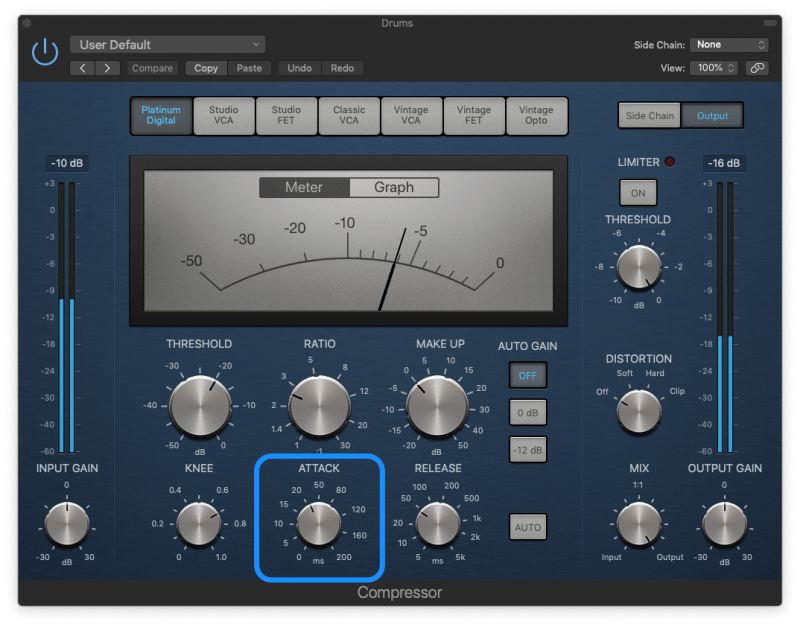
Let’s look a little more into the attack and release time so you won’t have to rely on faith alone!
Attack time is the time the compressor takes to start working. Release time is the time it takes to stop.
Release time is usually less important than attack time. Leaving the compressor on auto-release is a fine choice in many situations.
The attack time is a little trickier. It varies depending on the instrument.
There are no defined standards but attack time below about 5 ms is considered to be fast. Medium is 5–20 ms, and anything above 20 ms is slow.
Start out with just these three settings (fast, medium, and slow) in mind. That can help you avoid all the confusion.
Over-Compression Sign #4: Peaks and Valleys
An over-compressed track looks like a rectangular block in meter/graphs. The waveform has no peaks and valleys like a natural sound wave would. Instead, it’s a smooth block.
Often this shows the compressor has worked so hard on the track the waveform has started to even out.
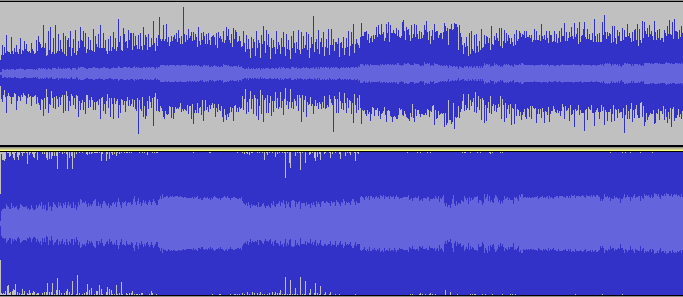
A well-compressed track will still have the peaks and valleys of a natural sound wave.
Examples of Over-Compression
Now that you’ve learned what to look for in over-compression, see if you can spot the signs in these audio examples.
Vocals – Original
Vocals – Compressed
Vocals – Over-Compressed
Guitar – Original
Guitar – Compressed
Guitar – Over-Compressed
Compression in Series
Here’s a cool trick…
Use compressors in series. Don’t do it all with a single compressor.
Try out different compressors or multiple instances of the same one.
Because each compressor doesn’t have to work as hard, serial compression helps your compression to sound more natural.
Parallel Compression
This next trick can bring about a huge difference in your mixing skills.
What if you could compress a track and then blend its compressed copy with the original one?
That’s right, any compressor can work for the process of parallel compression.
Use the ‘send’ bus instead of inserting it directly in the signal chain. A lot of new compressors have an inbuilt option for parallel compression.
Parallel compression, also known as New York compression allows you to compress an audio signal while preserving the positive characteristics of the dry signal (such as transients).
Why Is It so Easy to Fall for Over-Compression?
There are quite a few reasons…
Learning Curve
One reason could be that you’re still learning how to use compression. And that’s fine!
As a mixing engineer, the best way to learn is to experiment. You can’t learn to compress properly without learning what over-compression sounds like.
Wrong Choice of Compressor
Have you ever been in a situation where you compress a little more just because the compressor improves the overall tone? If so maybe you were using the wrong compressor.
Every compressor manipulates the sound differently. Some are transparent while others are bold. A lot of mixing engineers prefer to use a variety of compressors for different instruments.
Going with a transparent compressor while trying to control the tone can be a disaster! You might end up compromising your dynamics without even achieving the results you were going for.
Losing Reference
Mixing is about enhancing the whole song and not just a single element. We can end up over-compressing if we focus on the sound of one instrument and ignore how it fits with the rest of the mix.
Our ears have a short attention span. Mixing continuously for hours can easily wear down your listening skills. To get past this hurdle, mixing engineers employ different methods such as using a reference track or mixing in a series of small sessions.
Check out this video to learn about reference tracks, one of the best ways to improve your mix.
Subjective to Genre
Compression is also subjective to different genres of music. It is like any other mixing process.
Every genre is treated with a unique approach.
Mixing engineers should be aware of traits particular to their genre. For example, heavy compression is desirable in rock.
But doing the same thing with jazz can probably get you fired! (Though there are exceptions.)
Once you get acquainted with the basics, try something advanced. For example, slower release times on a blues track to enhance that shuffle feel.
In a Nutshell…
Now you’ll be able to use compressors with much more precision.
Remember good compression brings clarity, uniformity, and presence to the track. Over-compression makes it too thick and squashed.
You’ll know the ‘right amount’ of compression if you have a direction while mixing.
Compression can be tempting at times, due to the loudness and power it brings to the table. But again, too much of it and you’ll exhaust your listeners.
Not everything needs to be compressed.
NOTE: We recently uploaded a video from our Compression Breakthrough course, dealing with transients:
Next Steps
If you want to dig deeper into music production and learn what it actually takes to make mixes that sound pro…
And you’re an intermediate or advanced producer…
Be sure to check out the free masterclass:
Enjoy!


