


There are many factors to a “good” mix.
To me, a good mix is one that best conveys the message and emotion of the song.
There are numerous ways to do this, and this important end goal must be considered with every move.
You can spend as long as you want on automation, balancing, compression and other tools…
But if your mix doesn’t have SEPARATION, and your mix isn’t CLEAR – none of that matters.
This is part two of the One Month EQ Challenge…
And today you will learn exactly how to make sure your mixes sound clear and defined.
I’m guessing you’re here because you want to make your mixes sound professional. We put together a brief training that covers a totally new approach to music production. Until now, everyone has been teaching production totally backward. Just click below to watch.Get industry-quality every time (steal this framework)
But if you just want to learn about Mix Clarity specifically, keep reading.
Is This Really an EQ Issue?
A lot of my students ask me how to achieve separation and clarity in their mixes.
Generally, they are referring specifically to EQ techniques that they can implement.
As with most things in the world of mix engineering, it isn’t that simple.
Sure, your use of equalization will have a huge impact. But there are some other issues that you must address first.
In this tutorial, you will about both EQ and other measures.
Get These Things Right First
In the last video, we covered the basics of EQ as well as the 4 key approaches.
If you haven’t watched that yet, make sure you sign up to get the whole series and watch that first.
You need to have a good foundational knowledge of equalization and how it works before you can progress any further.
Watch that first video, and you will have exactly that (if you have already signed up, please check your inbox for the link).
There are two more factors that are important whenever applying EQ: listening environment and referencing.
Know Your Listening Environment
To accurately apply EQ to any sound source, you need a good listening environment.
This DOESN’T mean you need a professionally treated room and expensive monitors.
It DOES mean learning your room and equipment.
Acoustic treatment and proper monitors will help you immensely. As will a decent pair of mixing headphones.
Watch this to learn more about acoustic treatment:
ARVE Error: src mismatchprovider: youtube
url: https://www.youtube.com/watch?v=yrHBCCQT3gs&list=PLEEVAiK8zmk-obNdG_qsf8vJQdKlcW31-&index=4&t=0s
src in org: https://www.youtube-nocookie.com/embed/yrHBCCQT3gs?list=PLEEVAiK8zmk-obNdG_qsf8vJQdKlcW31-
src gen org: https://www.youtube-nocookie.com/embed/yrHBCCQT3gs
But if you don’t have those things, just make sure you learn your equipment.
How? Through referencing…
The Importance of Referencing
Every time you mix, compare your work to a professionally recorded and released track.
Think of the tone you want to achieve (modern/warm/aggressive etc.) and find a track in a similar genre that has those qualities.
Now drop it into your DAW and compare it to your mix. Where is your mix lacking? Does it sound muffled? Or does it sound too bright? Is the low end too loud? Or too quiet?
Whenever applying EQ, referencing can help you to make the right decisions.
Consider your listening environment, use a reference – and applying EQ will become far easier.
Separation (Or Making Every Part Audible)
To me, separation means one thing: a mix where every important element is clearly defined AND doesn’t interfere too much with other elements of the mix.
The opposite of separation would be a cluttered, busy or messy mix.
Imagine a mix where all of the instruments battle each other for attention. The vocal gets lost in a sea of guitars and percussion. The lead guitar is undistinguishable from the rhythm part.
It’s difficult to hear each part LET ALONE hear the intricacies and emotion of the performance.
Now imagine a mix where everything has it’s own space and corner within the frequency spectrum. Every lyric is audible, and the melody of the lead guitar part sits perfectly in the mix – yet they aren’t fighting each other or battling for attention.
As you move your focus around the mix, you can easily distinguish each part. The bass, the kick drum, the snare, the electric piano… There’s a lot going on, yet you can easily focus on each part.
In case you hadn’t figured out, you want to aim for the second example.
But how?
Arrangement

Before I address EQ, let’s go over the other techniques for adding separation to your mix.
You see, separation starts before you even touch a microphone or DAW.
Arrangement in this context refers to two simple things:
- The instrumentation of the piece
- The choice of octave (or register) for the various parts
Consider a band that has 4 different guitarists (and nothing else). Separation isn’t going to be so easy to achieve.
Now consider a chorus where three different instruments play the lead melody, but all in the same octave. They might sound good as a whole, but there will be little separation between the parts.
Think about the instrumentation of the song and how it could help or hinder separation within the mix.
Also make sure the most important parts are spread across multiple registers. It’s fine for three instruments to play the same melody if they all play it in a different octave.
And bear in mind that sometimes separation ISN’T desirable. Think about an orchestra – the entire cello section is meant to blend together to create one coherent sound.
That’s part of the music. Just don’t waste your time trying to give those parts separation later in the mix.
Balancing
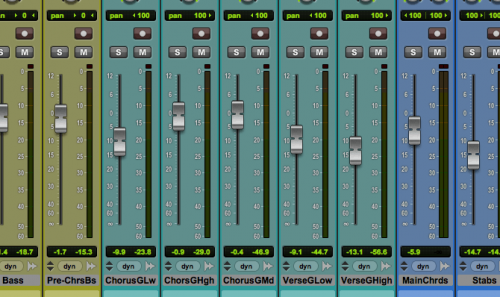
Volume balancing is your main tool as a mixer.
Did you know that mix engineers used to be called ‘balance engineers‘?
Before you even THINK about panning, EQ, compression or anything else – remember that the majority of your mix comes from the balance between the channels.
So, how does balancing relate to separation? Well…
If everything is loud – nothing is loud.
Your mix needs to have focus.
Decide which elements are the most important (usually the lead vocal, any melodic parts, and occasionally the rhythm section). Now make everything else quieter.
It might seem simple, but spending longer on balancing is the first step towards separation.
This is also where automation comes into it. Generally, a static mix isn’t enough.
At different points in the song, you will want different parts to have the focus. Use volume automation to counteract this problem.
For example, the guitar part might provide a supportive role in the chorus, but a more prominent role in the verse. Automate the volume accordingly.
To learn more about getting a great static mix, watch this video:
ARVE Error: src mismatchprovider: youtube
url: https://www.youtube.com/watch?v=RHgTM5eAz-I&index=5&list=PLEEVAiK8zmk9muxr8Z72R6lHf22183PrS&t=0s
src in org: https://www.youtube-nocookie.com/embed/RHgTM5eAz-I?list=PLEEVAiK8zmk9muxr8Z72R6lHf22183PrS
src gen org: https://www.youtube-nocookie.com/embed/RHgTM5eAz-I
Panning
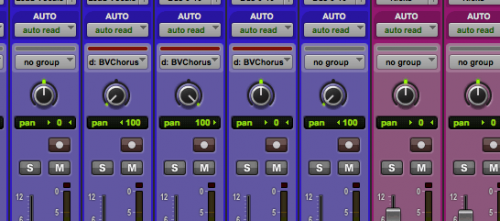 Another easy way to get separation in your mix is by making use of the entire stereo field.
But, at the same time, don’t rely on panning too heavily – a lot of people will hear your mix in mono.
Start by panning only hard left, dead center or hard right. Keep most your pan pots at one of these positions.
Now fill the gaps between with one or two parts on each side (but no more).
Achieving Separation with EQ
Before you learn about specific techniques for creating separation with EQ, you should have an understanding of what frequency masking is.
It sounds complicated, but it’s not. Essentially, it is this:
When two parts battle for the same space in the frequency spectrum, they mask each other.
They might sound great in solo, but when you put them together they sound mushy and undefined.
Before you address frequency masking with EQ, you should address it with arrangement and balancing.
But after doing those two things, you can further enhance the separation within the mix using EQ…
UPDATE: We recently released a video that shows a great trick called the “Mute button mixing trick”:
Range Allocation
There’s a simple way to create separation between the most important parts in the mix. I like to call this Range Allocation.
NOTE: You only want to create separation between the most important parts, not everything. Parts that play a supportive role don’t need separation (remember the example of an orchestra).
Range Allocation is the act of giving each part it’s own range within the frequency spectrum. Some people call this frequency slotting.
The best way to describe this technique is through the use of an example…
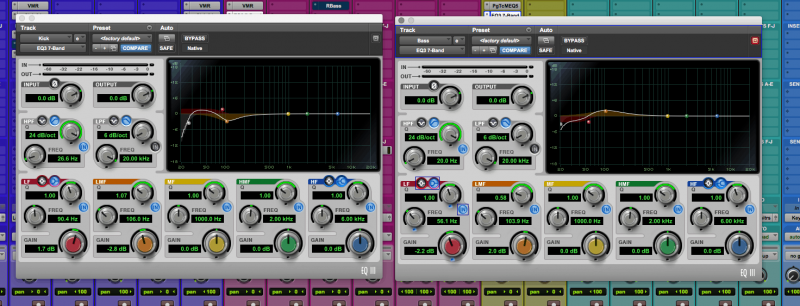
In a typical rock track, you will want separation between the kick and the bass.
Allocate one of the parts to the sub bass range (let’s say 30-80Hz) and the other part to the bass range (let’s say 80-200Hz).
Which way round you chose to do it depends on the vibe of the track…
For a groovy, more rhythmic track – allocate the kick to the sub bass range. For a heavy, constant low end – allocate the bass guitar to the sub bass range.
Now that you have an idea in your head of where each part is sitting in the frequency spectrum, EQ accordingly.
If you boost 30-80Hz on the kick, cut it on the bass. If you boost 80-150Hz on the bass, cut it in the kick.
And by cut, I don’t mean remove completely (for example, with a filter). I mean a subtle 1-5dB wide cut.
There will be an entire video showing you how to use Range Allocation in your mixes later in the One Month EQ Challenge.
Mix in Mono
I advise mixing in mono until the end of the mix.
This forces you to create separation with arrangement, balancing and EQ rather than relying on panning.
Once you have finished applying EQ and compression, and are nearing the end of the mix, start panning.
The mix will open up and you won’t believe the amount of space and separation.
UPDATE: We just released a great video about mixing in mono:
Focus on the Mid Range
Most problems with separation and frequency masking occur in the mid range.
Sure, getting the relationship between the kick and bass right is important – but far more people will notice when the guitars and vocals clash.
I spend around 30-50% of the mix on a single Behritone speaker.
Don’t get me wrong – this speaker sounds pretty awful. It’s tiny. It pretty much sounds like a crappy PC speaker.
But here’s why it’s important: the small size means the speaker only produces mid frequencies.
It can reveal problems in the mids that you might not notice on larger monitor speakers.
Check your mix on multiple speaker systems and focus on the mid range. Where are the problems? What parts are fighting with each other?
High-Pass Filtering
There’s an easy way to get separation between the low end parts (kick and bass) and the rest of the mix…
Use high-pass filters on any parts that have low end BUT don’t need it.
That’s an important distinction – don’t start using a high-pass filter on everything, otherwise your mix could start to sound thin and weak.
Only use a high-pass filter on parts that don’t NEED any low end.
For example, use a high-pass filter on electric guitars, acoustic guitars (if they play a supportive roll), vocals, keys (if they aren’t providing the bass) and toms.
Start at 50Hz and bring the filter up until you notice a loss of bass or warmth – then back it off a touch.
Sometimes though, that loss of low end can make the part sound clearer and help it to stand out in the mix (with vocals for example). Use your judgement.
Oh, and make sure you do this in the context of the mix, not in solo.
Clarity (Air, Brightness and Shimmer)
Before we dig in to adding clarity to your mixes, be aware that clarity is a relative term.
As with loudness, if everything in your mix is clear, nothing is clear.
Usually you want the vocals, cymbals (sometimes snares), acoustic guitars and piano/keys to have clarity.
Electric guitars, bass guitars, kick drums and other supportive parts don’t need clarity.
In order to give clarity to the parts that matter… you need to make the supportive parts less clear.
There are a number of ways to do this.
High Cuts and Low-Pass Filters
Most people never consider using a low-pass filter when mixing.
But by removing the top end from the parts that are more supportive – OR the parts that don’t need/have any top end – you can add depth and clarity to the mix.
if you want to make a part sit further back in the mix, cut the highs.
Whether you use a high shelf or a low-pass filter will depend on how far back you want the part to sit. But you still want the part to be audible. Try not to cut the high mids or anything else below 6kHz.
In this process, you are also making more room in the top end for the stuff that matters (like the vocals).
High Shelf Boosts

The next step is to boost the top end of the parts that matter.
I boost the top end of the vocals in pretty much every mix. A high shelf boost as low as 6kHz can work, but more often it’s around 10kHz+.
Now the vocals sound super-clear in the context of the mix.
Try to use an analogue-modelling EQ for this rather than your stock parametric EQ. Free plugins like Slick EQ work well for this.
You can also try adding a top end boost to the entire mix, on your stereo fader. Do this at the beginning of your mix, though, not at the end.
Beware of Harshness and Brittleness
When boosting the top end, keep it subtle (unless you know what you are doing).
If your mix starts to sound harsh or brittle, it’s because you have either a) been too aggressive with your boosts, or b) boosted the high mids as well as the top end.
Check the frequencies of your boosts and try to stay above 10kHz.
Try to find the source of the problem an fix it. But, if you are in a rush, try a wide 1/2dB cut around 5-10kHz on your mix buss.
Conclusion
Remember that mixing comes towards the end of the production process.
Problems with separation in particular need to be addressed earlier in the songwriting and recording phases. Only then can you ENHANCE separation in the mix phase.
As for clarity, it’s relative. Focus on creating depth within your mix, and then you can really add clarity to the parts that matter.
In the next part of the One Month EQ Challenge you will learn how to prevent and fix muddy mixes.
You don’t want to miss that one!
For now, leave a comment below…
Do you struggle to add clarity and separation to your mixes? What have you found that works from you?
What are your favorite tips from this article? What are you going to try first? I would love to hear from you.
If you want to dig deeper into music production and learn what it actually takes to make mixes that sound pro… And you’re an intermediate or advanced producer… Be sure to check out the free masterclass: Enjoy!Next Steps


