


If your low end is out of control, your entire mix will crumble. Unfortunately, low frequency buildup is a super common issue in home studios.
The best thing you can do is put bass traps in your room. But premium bass traps cost a lot of money.
That’s where this guide comes in.
By following all the steps, you’ll be able to make your own DIY bass traps. That way you can get pro results without spending an arm and a leg.
I’m guessing you’re here because you want to make your mixes sound professional. Well, you don’t need expensive gear or software to do that – you just need the right knowledge. We put together a brief training that covers a totally new approach to music production. Until now, everyone has been teaching production totally backward. Just click below to watch. Get industry-quality every time (steal this framework)
But if you just want to learn about DIY bass traps specifically, keep reading.
Why Are Bass Traps Important?

Bass frequencies are the Achilles heel of most studios. They easily build up and can throw your whole room out of balance.
If these low frequencies aren’t controlled, they’ll end up sounding way too loud or too quiet. Your recordings and mixes will end up sounding unbalanced and unprofessional.
Low frequency buildup is the ultimate mix killer. It’s one of the main reasons your mix may sound great in your room but terrible everywhere else.
Acoustic panels are great for controlling higher sounds.
But when it comes to lows, you really need bass traps. They’re specifically designed to absorb low frequencies.
But bass traps can cost a lot of money!
That’s why building your own is a great idea. You can tame your unruly room without going way over budget.
So let’s talk about the material you’ll want to have on hand.
What You’ll Need
Here are the big-ticket items you’ll need.

Getting the Power Tools
If you don’t already have access to a saw or power drill, you can rent these from a hardware store. Places like Lowe’s and Home Depot should have you covered.
These stores can also cut your wood for you. It’ll cost some money, but it’s a solid option if you aren’t comfortable using a saw.
How to Tell If Fabric Is Acoustically Transparent

You need acoustically transparent fabric for your bass traps. This means sound will pass through the fabric instead of bouncing off it.
Luckily, there’s an easy way to see if a fabric will work! Hold the fabric up to your mouth and breathe in.
If you find it easy to breathe, the fabric should work. But if it’s hard to get air through the fabric, it’s probably too thick.
Check arts and crafts stores like Joann Fabrics and Craft Stores. They have sales often, so you may save some money by going there.
Finally, before we dive in, let’s talk about safety precautions.
Safety
This is the most important part of all.
Your safety is way more important than having a room that sounds good. There’s no need to risk life and limb while making these panels.
Power tools and fiberglass can be really dangerous if you aren’t careful. So make sure you’re ready before you use them.
Here are some general guidelines, but it’s not an exhaustive list. Make sure to research your tools and materials before using them!
Using Power Saws
When using a saw, wear safety goggles.
Keep your hands away from the blade, and unplug your saw when it’s not in use. You’ll also want to wear protective gloves when changing blades.
If you’re using a saw you aren’t familiar with, make sure to brush up on how it works. Read the manual and watch a few video tutorials.
You’ll also need a couple of clamps to hold the wood steady. If the wood starts shifting around, you’re more likely to have an accident.
Handling Fiberglass
Wear safety goggles, gloves, closed-toe shoes, and long sleeves.

You don’t want fiberglass to touch your bare skin. It won’t be a disaster if it does, but you will be very itchy.
Breathing in fiberglass may be damaging to your lungs. Wear a breathing mask and make sure you don’t leave fiberglass laying around.
When you aren’t using it, it should be covered up.
It can also make asthma flare up. So if you have asthma, you may want to ask a friend to handle the fiberglass for you.
Power Drills
And finally, wear safety goggles while drilling. When you aren’t using it, keep your finger off the trigger and leave the safety on.
Now that we’ve covered safety precautions, let’s build some panels!
Step 1: Figure Out How Many You Need
Figuring out how many bass traps you need and where to put them can seem tricky at first.
Low frequencies build up in the corners of your room. How many you need depends on how many corners are in your room as well as your budget.
Do you have a rectangular room with four corners?
I recommend making however many you need to cover the full length of the wall on these corners. Like this:

As for height, you should be able to stack 3 bass traps on top of one another.
If you’re trying to keep costs low, just make ones that cover the corners at the floor and ceiling.
Step 2: Find Your Dimensions
First, figure out how deep you want your bass traps to be.
You probably want at least 4 inches of insulation. But it’s pretty common to see bass traps that are 10 or more inches thick.
The deeper it is, the more absorption you’ll get.
As a general rule of thumb, shoot for somewhere between 4 and 18 inches of depth.
Then, figure out how tall you want your bass traps to be.
If you can cover the entire corner from floor to ceiling, that’s great. But if you’re trying to keep your budget low, just try to cover as much of each corner as possible.
Once you know how big you want your bass traps to be, open up the dimension calculator.

Type in how big you want your bass traps to be.
The calculator will tell you the dimensions for all your materials. And how much fiberglass you’ll need.

Once you’ve found the right dimensions, measure them out on your wood and fiberglass. Mark where you’ll need to make cuts.

Bonus Tip: Speed Square
When making your marks, use a speed square.
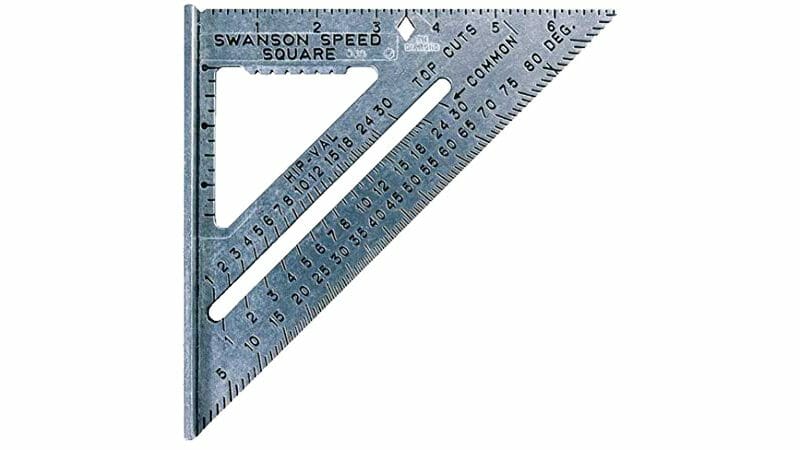
Your marks will be much straighter, so you won’t have to worry about accuracy.
Step 3: Make Your Cuts
We’ll need a wood frame to hold it all together. Which means it’s time to start cutting some wood!

Double-check that your measurements match the numbers from the calculator. Then set up your sawing station.
This’ll differ depending on the kind of saw. Whether you’re using a circular saw, a table saw, or something else, make sure you know how to set it up.
Cutting the Oriented Strand Board (OSB)
First we’re going to cut some triangles that’ll serve as the top and bottom of the frame.
Grab your OSB and begin making your cuts. Make sure they’re as straight as possible.
You want to end up with two triangular boards that have a perfect right angle.
If you make a bad cut, you may need to redo it.
Cutting the Furring Strips
Next we’re going to cut the furring strips. We’ll be using these as columns to support the traps.
Grab your 2″ x 2″ furring strips (or 51 mm x 51 mm) and simply cut them to the right size.
Again, double-check that your measurements match the numbers from the blueprint before cutting.
Step 4: Assemble the Frame
Now that we’ve got the pieces, it’s time to put them together!
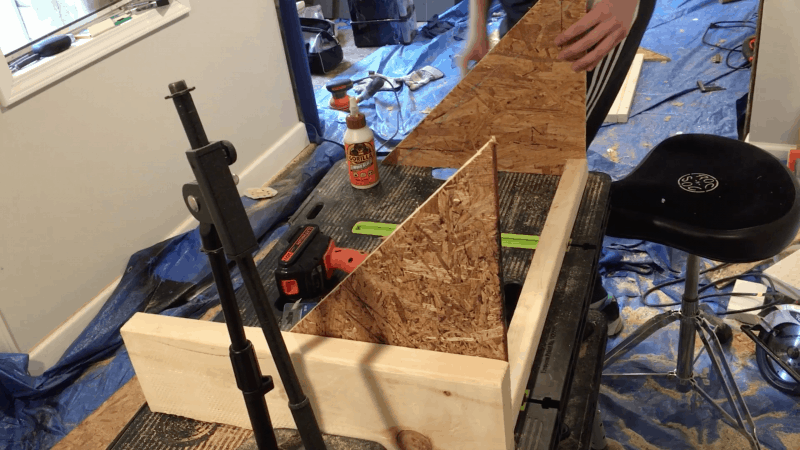
Gluing the Frame Together
To make this part easier, put some objects behind one of the OSB triangles you made. That way you don’t have to worry about it falling over.
Then add wood glue to both ends of a furring strip. Press one end into the 90 degree corner of the OSB.
Hold it there for a few seconds so it can dry.

Press your second OSB triangle against the other end of the furring strip. Once again, you want the 90 degree angle of the OSB lined up with the furring strip.
The glue will help hold it together, but now we need something sturdier to really keep it all in place.
Reinforce the Frame with Screws
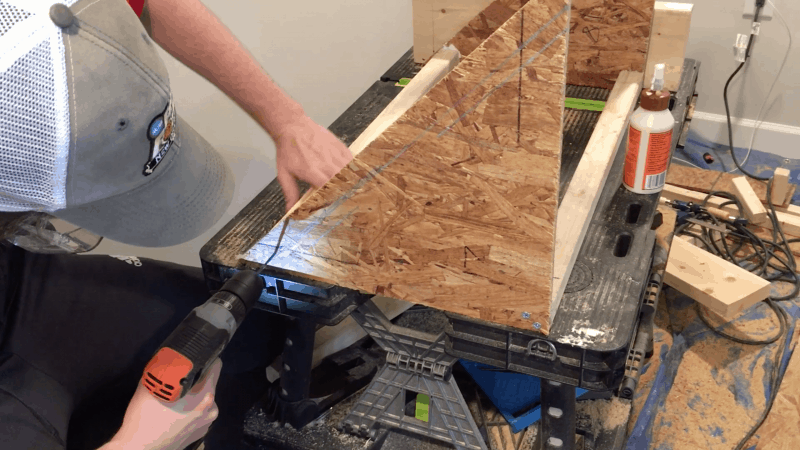
Adding screws to the frame will make it much stronger. But first we need to make some pilot holes.
Pilot holes are small holes that you add before the actual screw. They make it easier to put the screw in.
Grab your drill and your 5/64″ drill bit.
Drill a pilot hole into the center of the furring strip, through the OSB.
Once that’s done, drill a screw in. Once that’s done, drill a pilot hole and a screw into the other side.
Easy!
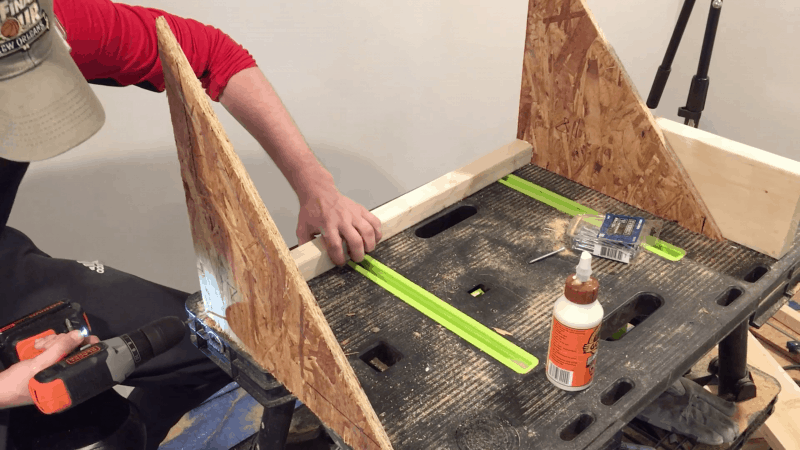
Attaching the Edge Columns
Flip the frame over.
Add wood glue to both ends of another furring strip. Put the furring strip between the OSB triangles.
Here’s where things get a little bit different.
Both ends of the furring strip should be completely touching the OSB triangles. This means you’ll need to place the strips a little further back.
Don’t worry that the ends of the triangles go further out than the columns. Once the fabric’s on, you won’t notice.
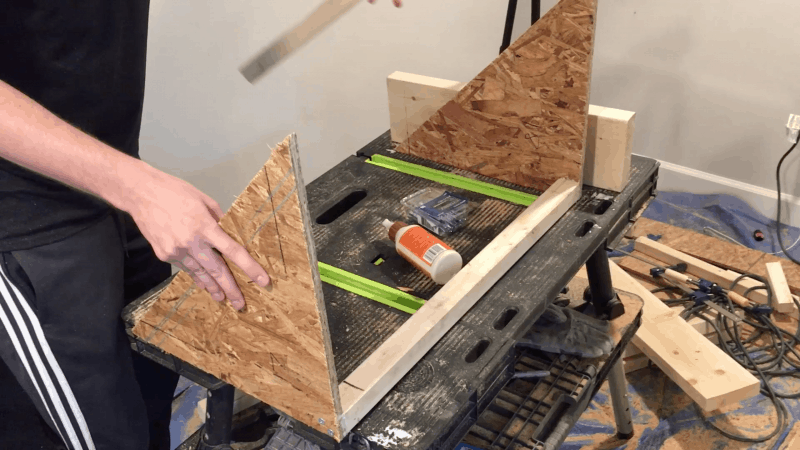
Once again, drill your pilot holes and screws into either end.
Repeat the same process for the last column. Now your frame is complete!
Step 5: Cutting Your Fabric
This part’s easy! You’re just cutting out the fabric to put on the frame.
You want the fabric to be at least 3″ longer than the frame on each side. That way you can pull it tight.
And make sure you iron the nice fabric.
That fabric will be facing outward, where everyone can see it. If there are any wrinkles or lines on the fabric, it’ll end up looking unprofessional.
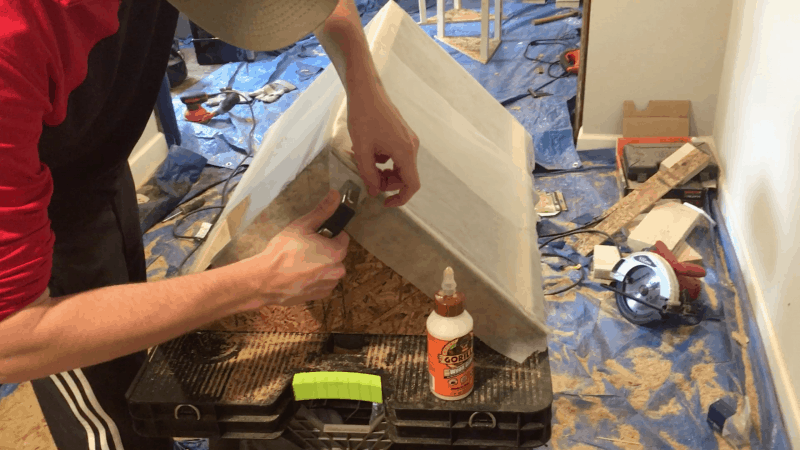
Step 6: Staple the Cheap Fabric to the Back of the Frame
Flip the frame over so the 90 degree angle of the OSB triangles is facing up towards you.
Lay your cheap fabric over the frame and start stapling it on.
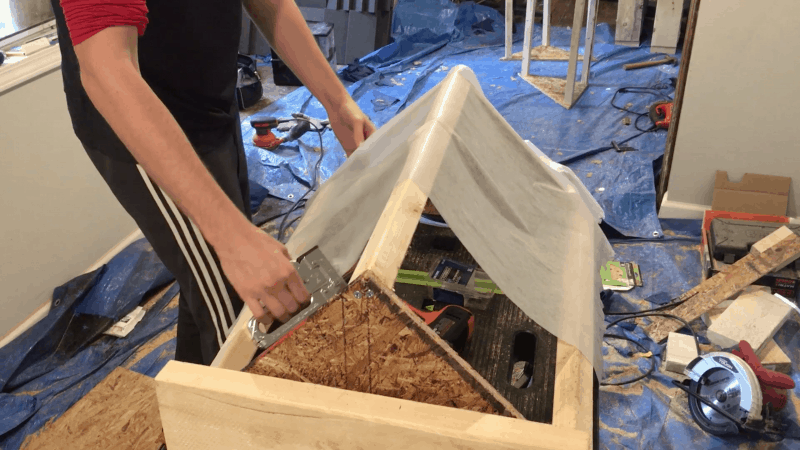
Add a staple every 6 inches or so. This fabric doesn’t need to be super tight since no one else is going to see it.
Step 7: Cut the Fiberglass
Your fiberglass won’t fit inside the frame unless you cut it. But first there are a few things you need to measure.
Measure the rectangles between the columns.

Then measure the triangle between those two rectangles.

These are the spaces you’ll be filling in the frame. Which means they’re also the shapes you’ll want to cut out of your fiberglass.
Measure those numbers out on the fiberglass and mark them with a permanent marker.

Use a serrated knife to cut the fiberglass.
Don’t forget! Make sure you’re wearing long sleeves, gloves, safety glasses, and a breathing mask while you’re doing this.
Step 8: Place the Insulation in the Frame
This is pretty self-explanatory. Just stack your blocks of insulation inside of the frame.

You want the front of your insulation as flush with the frame’s edge as possible. If insulation is sticking out, it’ll look like your bass trap is bulging.
Trim the edges of the fiberglass if you need to!
Step 9: Staple the Good Fabric to the Front
Lay the fabric over the frame. It should be centered so you have the same amount hanging over each side.
Staple one side of the fabric to the frame. It doesn’t really matter which side you start with.
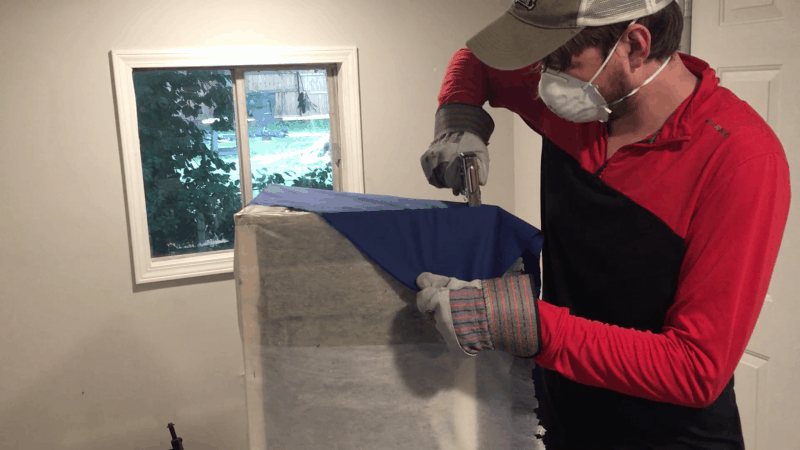
Make sure you’re pulling the fabric tightly while you staple it! You want it to look nice and uniform. A staple every 3–6″ should be fine.
Move around the frame, stapling the fabric to each side.
If you think it could still be tighter, you can add another round of staples between your first ones.
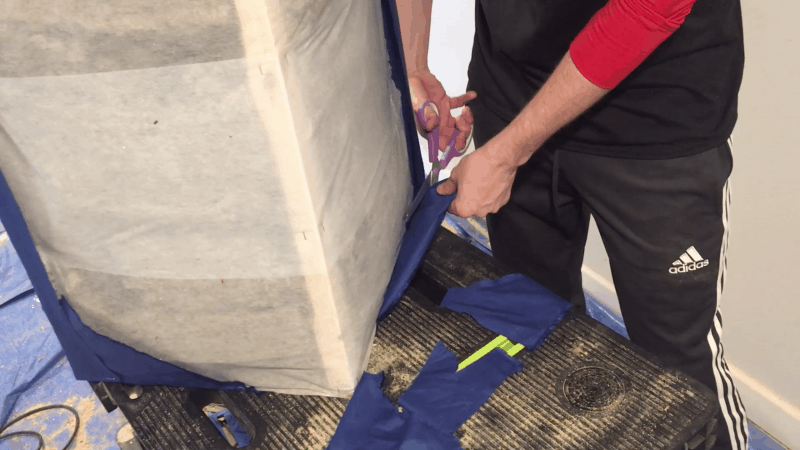
Once that’s done, trim the excess fabric. Grab a pair of scissors and cut the extra fabric hanging off the edges.
Just cut about a half inch below the staples.
Your bass trap is done!
Now we just need to place it in the room.
Step 10: Placing Your Bass Traps
Like I said, the corners of your room are the real trouble spots. So you want to make sure your bass traps cover them.
Simple enough, right? Just put your bass traps in the corners of your room.
But here’s an extra tip for even more absorption.
By moving your bass traps a couple inches away from the wall, they’ll absorb even more low frequencies.
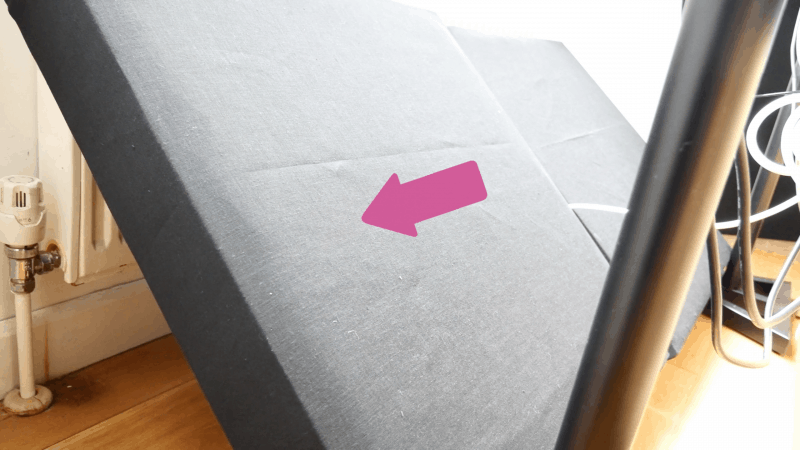
Low frequencies will pass through the bass traps, reflect off the wall, and rebound through the bass traps again.
If you’re in a really tiny space, this may be difficult to do. But leaving a small air gap between the bass trap and the wall will boost the amount of absorption you get!
But What If I Want to Control Higher Frequencies?
Bass traps are great at reducing low frequency content. But they aren’t as good at cutting out higher sounds.
You’re better off making some acoustic panels. Acoustic panels are great at reducing higher sounds in a room.
And if you want your room to sound good, proper speaker placement is crucial.
Conclusion
Now that you’ve got your bass traps built, you’ve taken a huge step towards better sounding songs.
If you want to dig deeper into music production and learn what it actually takes to make mixes that sound pro… And you’re an intermediate or advanced producer… Be sure to check out the free masterclass: Enjoy!Next Steps


