


Looking to record clear, professional vocals on a budget?
A DIY vocal booth is your answer.
In this guide we’ll be covering how to build your own vocal booth at home for a quarter of the price of a professional booth.
I’m guessing you’re here because you want to make your mixes sound professional. Well, you don’t need expensive gear or software to do that – you just need the right knowledge. We put together a brief training that covers a totally new approach to music production. Until now, everyone has been teaching production totally backward. Just click below to watch. Get industry-quality every time (steal this framework)
But if you just want to learn about vocal booths specifically, keep reading.
The BEST DIY Vocal Booth On A Budget (STEP-BY-STEP)
Why Do I Need a Vocal Booth?
If you imagine a band in your head, where is the singer on stage?
That’s right. Right in front, with the spotlight on them, commanding attention.

The same is true for your song. Your vocals need to be the most upfront thing in the mix.
That’s because your vocals are usually the melody. They’re the thing that your listener pays attention to the most.
So the next question is this: what pushes an instrument back in the mix?
That’s right. Reverb!
Your ears use the sound of the room to create a sense of space around yourself. When you hear a sound accompanied by reverb, it sounds farther away.
But when a sound is “completely dry,” or has NO reverb, then it sounds right up in your face.
That’s what vocal booths do. They absorb the sound of the room around you, making your vocals dry and clear.
Most professional vocals are recorded inside a vocal booth. It’s difficult to get that “pro” sound without one.
However, most vocal booths can cost a fortune. They usually range from $800 to $5,000 – a nightmare for a home studio artist.
Luckily, there’s no need to blow all that cash when you can build your own for a fraction of the cost.
Here are four common DIY vocal booth designs you can use at home.
DIY Vocal Booth #1: The Closet
This is the classic choice.
When you start recording at home, you hear this from all your friends…
“Make sure to record your vocals in closet! You’ll get a better sound!”
 And it makes sense. After all, you already have a closet. No assembly required. Zero dollars needed.
Before you get too excited, I’m going to stop you there.
DO NOT use the closet.
You’re actually going to hurt your vocals more than help them.
Here’s the idea behind the Closet Booth: it’s a small, enclosed space with a bunch of clothes in it. It’s small, so you don’t get much reverb, and the clothes will soak up extra room sound.
But you don’t have enough clothes to make this work. Trust me.
Even though you may have dozens of shirts hanging around you, it’s not enough material to absorb the amount of sound necessary for a good vocal booth. So most of that room sound is still there, getting picked up by the mic.
What this means is that rather than sounding like you’re singing in a vacuum, it sounds like you’re singing in a tiny, tiny room.
And the more you compress your vocals, the more obvious that will become.
If you’re wanting dry, radio-ready vocals, I’d resist the temptation to use this easy option.
DIY Vocal Booth #2: The Mattress Fort
Want to feel like a kid again? Try out the Mattress Fort.
 This design is simple. You surround yourself with mattresses so that you are covered behind, above, and to the sides.
The actual design will vary on how many mattresses you have. If you only have two, place both behind the singer in a V-shape.
If you have three, place them behind the singer in a C-shape.
And if you have four, keep the C-shape and place the extra mattress on top of the others, over the singer’s head. If you’re wanting to use the Mattress Fort, I’d recommend using this four-mattress version.
The nice thing about the Mattress Fort is that it’s extra thick material, meaning it will catch more frequencies in the mids and low-mids. This means a more balanced vocal.
The not-so-nice thing about the Mattress Fort is that it’s difficult to store and assemble. Unless you use small mattresses, carrying them into the room and setting them up is a two person job. Finding storage for an extra two to four mattresses is also pretty difficult for most people.
It’s important as well to make sure you’re using the right kind of mattresses. A spring mattress won’t do much of anything – it’s just metal wrapped in fabric.
The rule of thumb here is the heavier the material, the better. Try to use thick mattresses like memory foam. That will soak up a lot more sound.
Overall, this booth will cost you between $50-400, depending on where you get your mattresses.
DIY Vocal Booth #3: The Reflection Filter
You’ve probably seen these around your local music shop.
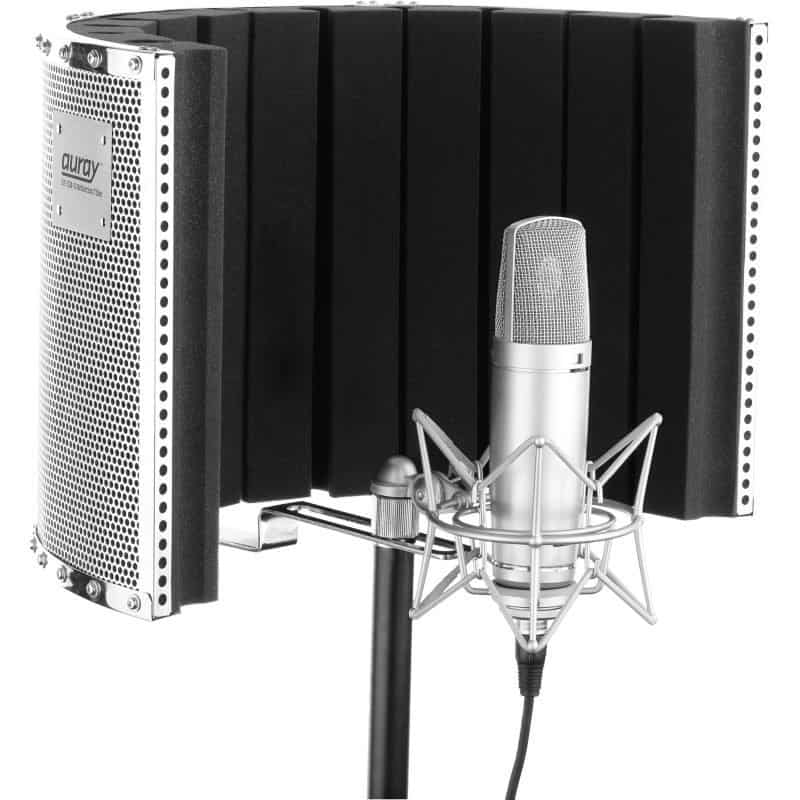 They’re basically a half-cylinder made of acoustic foam that goes up on your mic stand, behind the microphone.
Reflection Filters are very popular. They’re cheap (usually between $50 and $150), easy to store, and easy to assemble.
That said, they’re not actually doing much.
The area behind the microphone is known as the “null point.” It’s the place where the microphone picks up the least amount of sound.
So of all of the places that need to have acoustic treatment around them, the back of the microphone is the least necessary.
It doesn’t cover above, behind, or around the singer. That’s where most of your recorded room sound comes from.
That said, it does help. It just doesn’t do that much.
I’d recommend using one of these along with another vocal booth design. For example, using it with the Mattress Fort would be great. The only part of the Mattress Fort with no protection is behind the mic, which is exactly what the Reflection Filter covers.
It’s a perfect match.
Just don’t use one of these on their own. They’ll help, but you won’t get the results you’re hoping for.
DIY Vocal Booth #4: The Blanket Booth (My Favorite)
Alright. Now for my personal favorite.
This is the one I currently use in my own home studio.
The Blanket Booth is basically several acoustic blankets hanging from a frame made of PVC pipe.
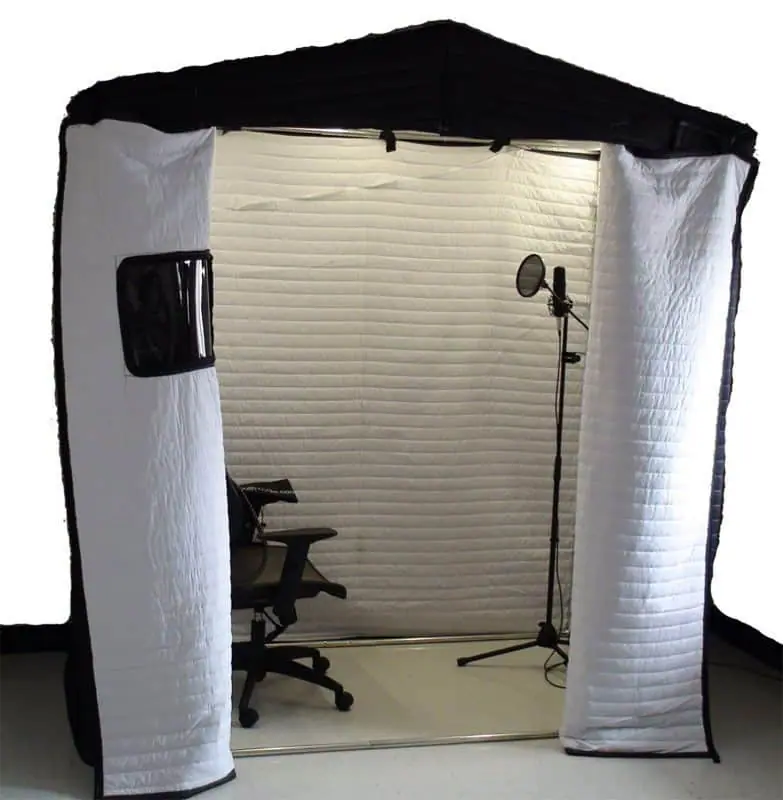
It works great. It soaks up room sound on all sides, leaving your vocals nice and dry. Plus, it can be torn down and built back up, making it much easier to store.
I also like that it gives you an enclosed space to be in. Whenever I’m tracking my own vocals, I feel like I’m in my own little world. I actually give better performances inside it.
This design will run you between $200 and $250, depending on where you get your materials. It’s a quarter of the cost of a professional vocal booth.
Let’s show you how to make one, step-by-step.
How to Build the Blanket Booth (Step-By-Step)
Step 1: Get Your Materials
To create your own Blanket Booth, you’ll need…
- 7 | 1-inch PVC pipes
- 14 | 1-inch T-Joints
- 8 | 1-inch Elbow Joints
- 24 | Shower curtain rings
- 1 | Junior hacksaw
- 4 | Acoustic blankets
- 4 | 2-inch Clamps (optional)
Note: Most PVC pipe comes in ten-foot-long segments, so to create my exact design you’ll need about 7 pipes. However, if you download the blueprints and size calculator, the amount of pipes you need may change depending on how big or small you want your own booth to be.
Acoustic blankets are specially designed to soak up sound waves. Most of the expense from this design comes from them – everything else is fairly cheap.
I’d recommend getting your blankets from Vocal Booth To Go. They make high quality acoustic blankets that come with grommets so you can hang your blankets from hooks or rings.
If the acoustic blankets are too expensive, a cheap alternative is packing blankets. These are the blankets you use to cover your furniture during a move. They aren’t as good at soaking up sound, but they get pretty close for a lower cost.
Step 2: Cut the PVC Pipe
Once you’ve downloaded the blueprints and decided on your custom size, it’s time to cut your pipes.
If you get your pipes from a hardware store, they’ll likely cut the pipes for you at the custom lengths you specify. If you can do this, do it. It will save you the work of cutting the pipes yourself.
If your hardware store doesn’t do custom pipe cutting, then use a tape measure and a Sharpie to measure out the lengths yourself.
Once you’ve done all your measuring, lay out some newspaper, hold your pipe off the side of a table, and use your junior saw to cut it.
Make sure to cut the pipe in as straight a line as possible. The straighter the edges of the pipe are, the more sturdy the booth will be.
Step 3: Build the Frame
Once you have your pipes cut, it’s time to build the frame.
This shouldn’t take more than 20-30 minutes.
It’s like adult LEGOs!
Step 4: Label Each Piece
Congrats – you’ve built the frame.
Before we put up the blankets, take a few minutes and label each piece of pipe with a Sharpie.
This will cut your setup time in half the next time you build the booth. It’s way easier to just grab a piece of pipe that says “top left” and put it on the frame than to individually measure each piece all over again.
Step 5: Hang the Acoustic Blankets
Before you start this step, make sure to hook your shower hangers in the blankets’ grommets. It’ll make your life a lot easier.
Once that’s done, just hang your blankets. You’ll use three blankets as the walls of the booth.
You’ll hang your blankets on the OUTSIDE of the frame, NOT the inside. That will make the blankets conform to the frame’s shape. Make sure to overlap two of them in front of the booth’s door so you can get in.
Then put the fourth blanket over the top of the booth. Try to drape it evenly so that it has the same amount of slack on all sides.
If you want the roof to be tight above your head, then use the clamps to fasten down the slack to the edges of the booth. This is optional, of course. I’m a pretty tall guy, so I like the roof to stay well above my head while I’m recording.
Step 6: Set Up Some Lights
All you have left is to give yourself a little light.
It’ll be pretty dark in there when you walk in. You’ll need a light source of some kind.
A bedside lamp would work just fine. I also like hanging some Christmas lights for ambience. It helps to set the mood nicely.
And with that, your booth is done! Congrats!
If you want to dig deeper into music production and learn what it actually takes to make mixes that sound pro… And you’re an intermediate or advanced producer… Be sure to check out the free masterclass: Enjoy!Next Steps


