

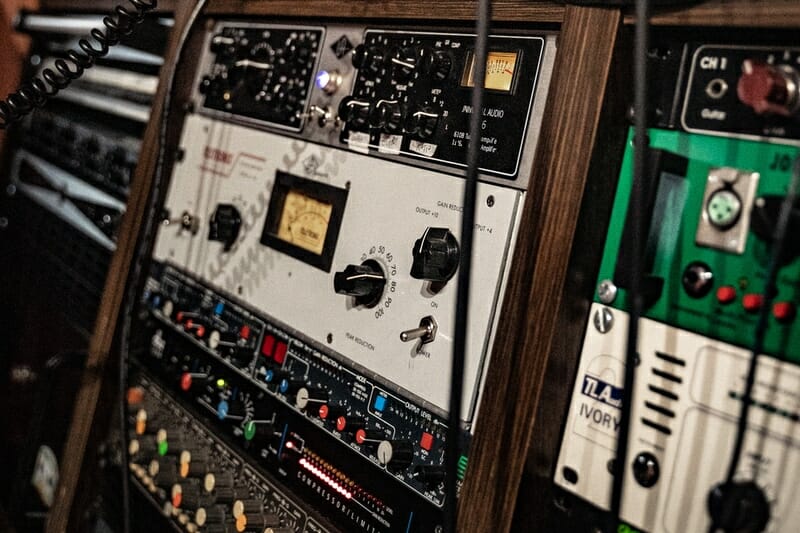
Mastering.
I refer to it as “The Great Mystery of Audio.” For years, I knew it existed, I knew it was important…
…but I had NO idea what it was.
I’d ask people over and over, and I’d get back the same answer:
“…I dunno. It makes the songs louder?”
I’ve since learned the secrets of audio mastering, and I’ve realized something important:
It’s SIMPLE. It’s not easy, mind you. It takes good ears and a lot of practice. But it’s SIMPLE.
In fact, you can master your own mixes at home in just 14 easy steps.
In this article you’re going to learn what mastering is, why you should get your songs mastered, and how to master a track in your own home.
Get industry quality every time (steal this framework)
I’m guessing you’re here because you want to make your mixes sound professional.
So before you read this entire post, I wanted to let you know that we have an in-depth video training that covers a totally new approach to music production. Inside, I reveal why learning mastering is actually the key to unlocking your potential as a mixer and producer.
And it might be better for you to start there first — especially if you’ve been doing this for a while, and you want your mixes to sound industry-standard… but you’re still struggling to achieve the sound in your head.
If that’s you, you need to watch this:
But if you just want to learn all about mastering specifically, keep reading.
How to Master a Song at Home
What is Mastering?
Let’s shed some light on this mystery.
Audio Mastering is the final step of the mixing process. It’s what happens to a song before it gets released to the world.
Mastering a song is simply using tools like EQ, compression, saturation, and limiting to accomplish these three things:
- To make the track louder (not just in volume, but also in PERCEIVED volume. More on that later).
- To make the track “sound better.”
- To make the track more translatable to all different kinds of speakers.
It also creates “Red Book” standard files for CD printing and audio streaming. But we’re not going to cover that here.
The point of mastering is to make a song “sound like” other professional songs on the market, so that when they’re heard on the radio, or in a playlist, or in the credits of a movie, they don’t sound out of place.
You also want to master your songs when you are putting out an album or an EP, to make sure all the songs are the same volume and have the same “tone.”
But it at its core…
Mastering is all about getting a second opinion.
If you have been mixing a song, you no longer have objectivity. You’ve heard every second of that mix over and over again.
Realizing where the problem areas are is ten times more difficult for you!
Mastering is a very special step with its own difficulties, so certain audio engineers began to specialize in these techniques. These mastering engineers were able to get better results than anyone else.
But here’s the REAL reason mastering engineers exist:
To give you a set of fresh ears.

Think of it like getting a second opinion after you’ve gone to the doctor.
These pros have a new room.
A new set of speakers.
And ultimately, a new opinion.
Because mastering engineers have not heard your music before, they can catch the mistakes you’ve made over hours and hours of mixing. They can make your song sound even better than it did before.
Learning how to master a song is important, because it changes how you mix. Ultimately, you want to mix with the master in mind. If need be, you wouldn’t want to not have to master the song at all.
But hiring a professional gives you what hours of practice cannot: objectivity. That’s why I recommend hiring one to work on your mixes.
If cost or time is an issue for you, though, then I’d recommend trying an automated mastering service like LANDR or Aria.
These are just algorithms that can analyze your song and optimize it to sound like a standard released track, so they’re not perfect.

They’ll never be as good as a pair of trained human ears.
But they are surprisingly good for quick masters or demos, and they’re cheap too.
If for some reason I don’t want to hire a professional, often I will send a copy of the mix to Aria to do an automated master and then master the mix myself as well.
Whichever I like better after listening to both, I keep.
If you use this strategy, make sure to stick with whatever you choose for the whole project. If you’re releasing an EP, for example, you don’t want two songs mastered by Aria and two songs mastered by you. You want consistency.
So, to review:
- Learn to master because it will improve your mixes,
- Because they can be objective, your masters will sound best if you hire a professional,
- And if need be, use an automated mastering service like Aria to do a “shootout” with your own master. Whichever you pick, use for your entire project.
How to Master Music
So now that you know what audio mastering is (and when to let a pro handle it), let’s learn how to do it!
Here are the essential steps of how to master a song for release online:
- Use EQ to make sure the song will sound great on all speaker systems
- Use a limiter to get the music loud enough to compete
- Bounce down the project at the correct settings for distribution
The most important thing to realize is this:
The secret to a successful master is preparation.
I use the Sharpen the Axe approach to mastering…
“Give me six hours to chop down a tree and I will spend the first four sharpening the axe.” – Abraham Lincoln

The first 8 of these 14 steps are ALL preparation! Without it, you’ll be mastering blind.
So without further ado, here’s the 14 Steps to Master Your Mix:

Step 1: Optimize Your Listening Space
Mastering is a subtle art. Extremely small moves can change how your entire mix sounds.
Because of this, you want to make sure your listening space is as accurate as possible.

Let’s think of it this way. If you were to master your song PERFECTLY – with perfect balance, loudness, and excitement – but your room is poorly tuned, it doesn’t matter!
Your song might sound amazing in your space, but it will fall apart everywhere else.
If, for instance, your room has extra bass build up, then your low end will seem louder than it actually is. So if you get your low end to balance perfectly in your room, what’s it going to sound like everywhere else?
Thin. Lifeless.
Obviously, you don’t want that.
Now, there’s a few things you can do to fix this. First of all, you can properly treat your mixing room with acoustic panels. I cover how to do this in my ultimate guide to setting up a home studio.
If you don’t want to spend the time or money to treat your room, you can also just take the room out of the equation by using headphones.
I recommend the Sennheiser HD600’s. It’s also worth using a headphone compensation software like Sonarworks Reference and Waves NX. These help to balance your headphones and make it sound like you are in a real room, and less like you are in a vacuum.
Step 2: Finish Your Mix (to Sound Mastered).
This is self-explanatory. Make sure you finish the mix first!

Mastering is the last step of the mixing process for a reason. Make sure you’re not trying to do both at the same time.
One important thing to do is to mix your song to sound mastered. While this doesn’t mean to literally attempt to master your song while mixing, it does mean you want to adequately prepare your mix for the master.
You want it to sound balanced in most systems, dynamically consistent, and exciting.
Rather than expecting the mastering engineer to make your mix sound more “stereo”, do it yourself with panning.
Rather than expecting the mastering engineer to make your mix more energetic, do it yourself with saturation.
Of course, you don’t want to overdo anything. You still want the mix to sound as professional as possible. But the rule of thumb is this:
You want the mastering engineer to have to do very little!
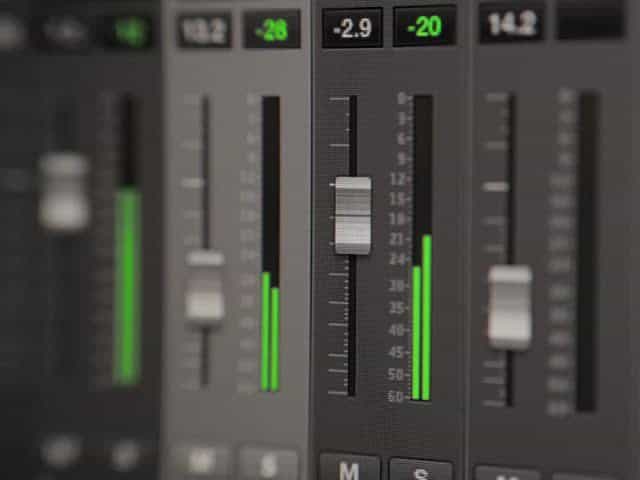
Step 3: Check the Levels.
Before you bounce (export) your mix, you want to make sure that nothing is clipping. Digital distortion can often be quiet when you are mixing, but during the mastering stage all of the little imperfections in your mixes become very obvious.
Make sure you have headroom on ALL of your faders. Any channel, buss, or send needs to stay out of the red.
Hopefully, this is something you were able to fix before the end of the mix. It’s always better to start the mix by properly gain staging your tracks and making sure nothing is clipping as you go.
You also want to make sure that the stereo output isn’t clipping and has enough headroom to work with while mastering.
You want the loudest part of your song to be peaking between -4 to -6dB on the stereo output.
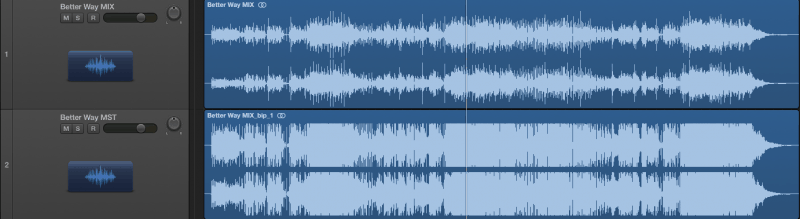
Step 4: Bounce Down Your Stereo Track.
Next step is very simple. Just bounce down your stereo track as its own file.

Make sure to keep your project settings exactly the same when exporting. If you recorded in 24 bit, bounce the file at 24 bits. If you recorded at a resolution of 48kHz, bounce your file at 48kHz. So on and so forth.
A few more things:
Make sure you are bouncing the file in your preferred lossless format. DO NOT export the song as an MP3! That’ll be done after the mastering. Export it as a wav or an aiff file.
Also, if your DAW has a “normalize” option when bouncing, make sure to not use it. Normalizing is essentially a crude way to make your track louder. We’re going to do that during mastering ourselves. No need to jump the gun.
Step 5: Take a Break (of at LEAST One Day).
Make sure to give your ears a break!

Mastering is a game of small, subtle changes, so you want your ears to be fresh before starting.
Even more importantly, you want your mind to be fresh.
If you’ve been working on the mix for hours (or days), then there’s no way you can be impartial while mastering.
Take a day break at a minimum. Preferably, take several days. A week. A month, even!
The longer amount of time between you mixing and you mastering, the more objective you can be (and the better your masters will be!)
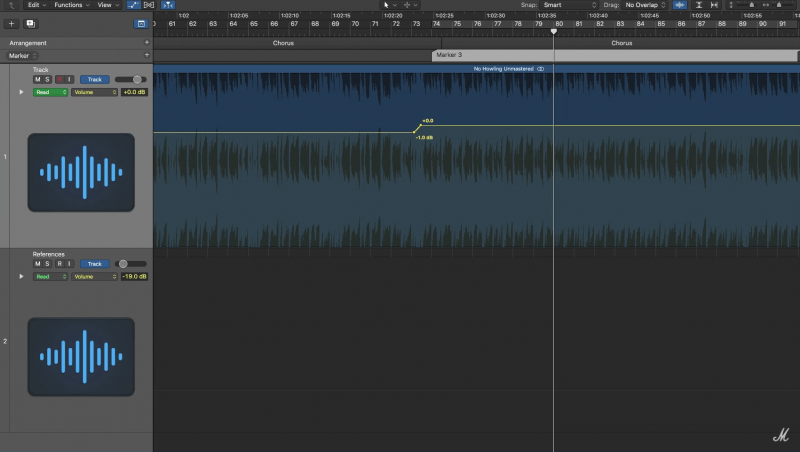
Step 6: Create a New Project and Import Your References.
Open up a new project and import your mix into it. Then import your references on a track beneath it.
I’m going to take this opportunity to get on my soapbox and preach for a second. Reference tracks are one of the biggest secrets to a successful mix and a successful master.
You need something to compare to while you’re doing your work. Otherwise you might be making mix moves that sound great in a vacuum, but fall apart when compared to other mixes in the real world.
Having professionally mixed music to listen to every so often while you work will keep you focused and making the best decisions for the song.
Step 7: Listen for The First Time (and Take Notes).
Alright, we’re finally going to get started!
First things first: you need to listen to your track.

Don’t scoff. The first listen is an incredibly important step.
If you gave yourself enough time, it’s been a few days since you’ve heard your mix. You’re coming at it with fresh ears.
This will be the most honest you will be with yourself. You’ll hear 80% of the problems in this first listen.
Make sure to keep a notepad by you, or open up a text doc on your computer. Take notes as you listen. These notes will become the basis of your moves while mastering.
Does the high end sound too brittle? Too dull?
Does the vocal stick out? Is it buried?
Does the track sound muddy? Does it sound too boring?
Write all this stuff down. You only get one first listen. Make it count!
Step 8: Make a Full Analysis.
Now it’s time to pull out all the stops.

Listen through the track a few times. Write down what you hear.
Listen to your references, then listen to your track. Write down what you don’t hear (or what you hear too much of).
Listen on your other speakers. Listen in your headphones. Write down what you hear.
Listen on your iPhone. Listen in your car. Write down what you hear.
The point of this is to have an accurate image of what your song CURRENTLY sounds like and what it NEEDS to sound like.
That way you can make intentional mastering decisions, rather than just using your tools at random.
Now, let’s talk about your references.
There’s a few things you can do (other than use your ears) to use these to their highest potential.
If you have a graphic analyzer, you can use it to compare the frequency spectrum of the two mixes.
 This will help you use your eyes as well as your ears. What looks too high or too low on yours?
Remember that this isn’t a perfect science. Every song’s frequency spectrum is going to look different.
This is just a trick to help you find problem areas that mights be less obvious to your ears.
Another trick you can do is use a filter to listen to just the low end of the reference. I show you how to do that here:
Just remember this: context is very important in audio mastering! It’s more important that something sounds good in relation to other songs than just sounding good in a vacuum.
One important thing to note: make sure you match their volume to the volume of your mix. Otherwise, your ear is going to hear differences that just aren’t there.
Loudness affects the way we hear sound. As we turn music up, our brains interpret that sound as having more bass and more treble.
So if your reference tracks are too loud or too soft, your masters won’t be balanced!
Step 9: Control the Dynamics.
Now, you’ve prepped enough. Time to get to work!
The first thing to do is to add some compression. We want to make sure that the dynamics of the entire track are being controlled.
You want the song to feel “glued” together.
Here’s how you set up your mixbus compression:
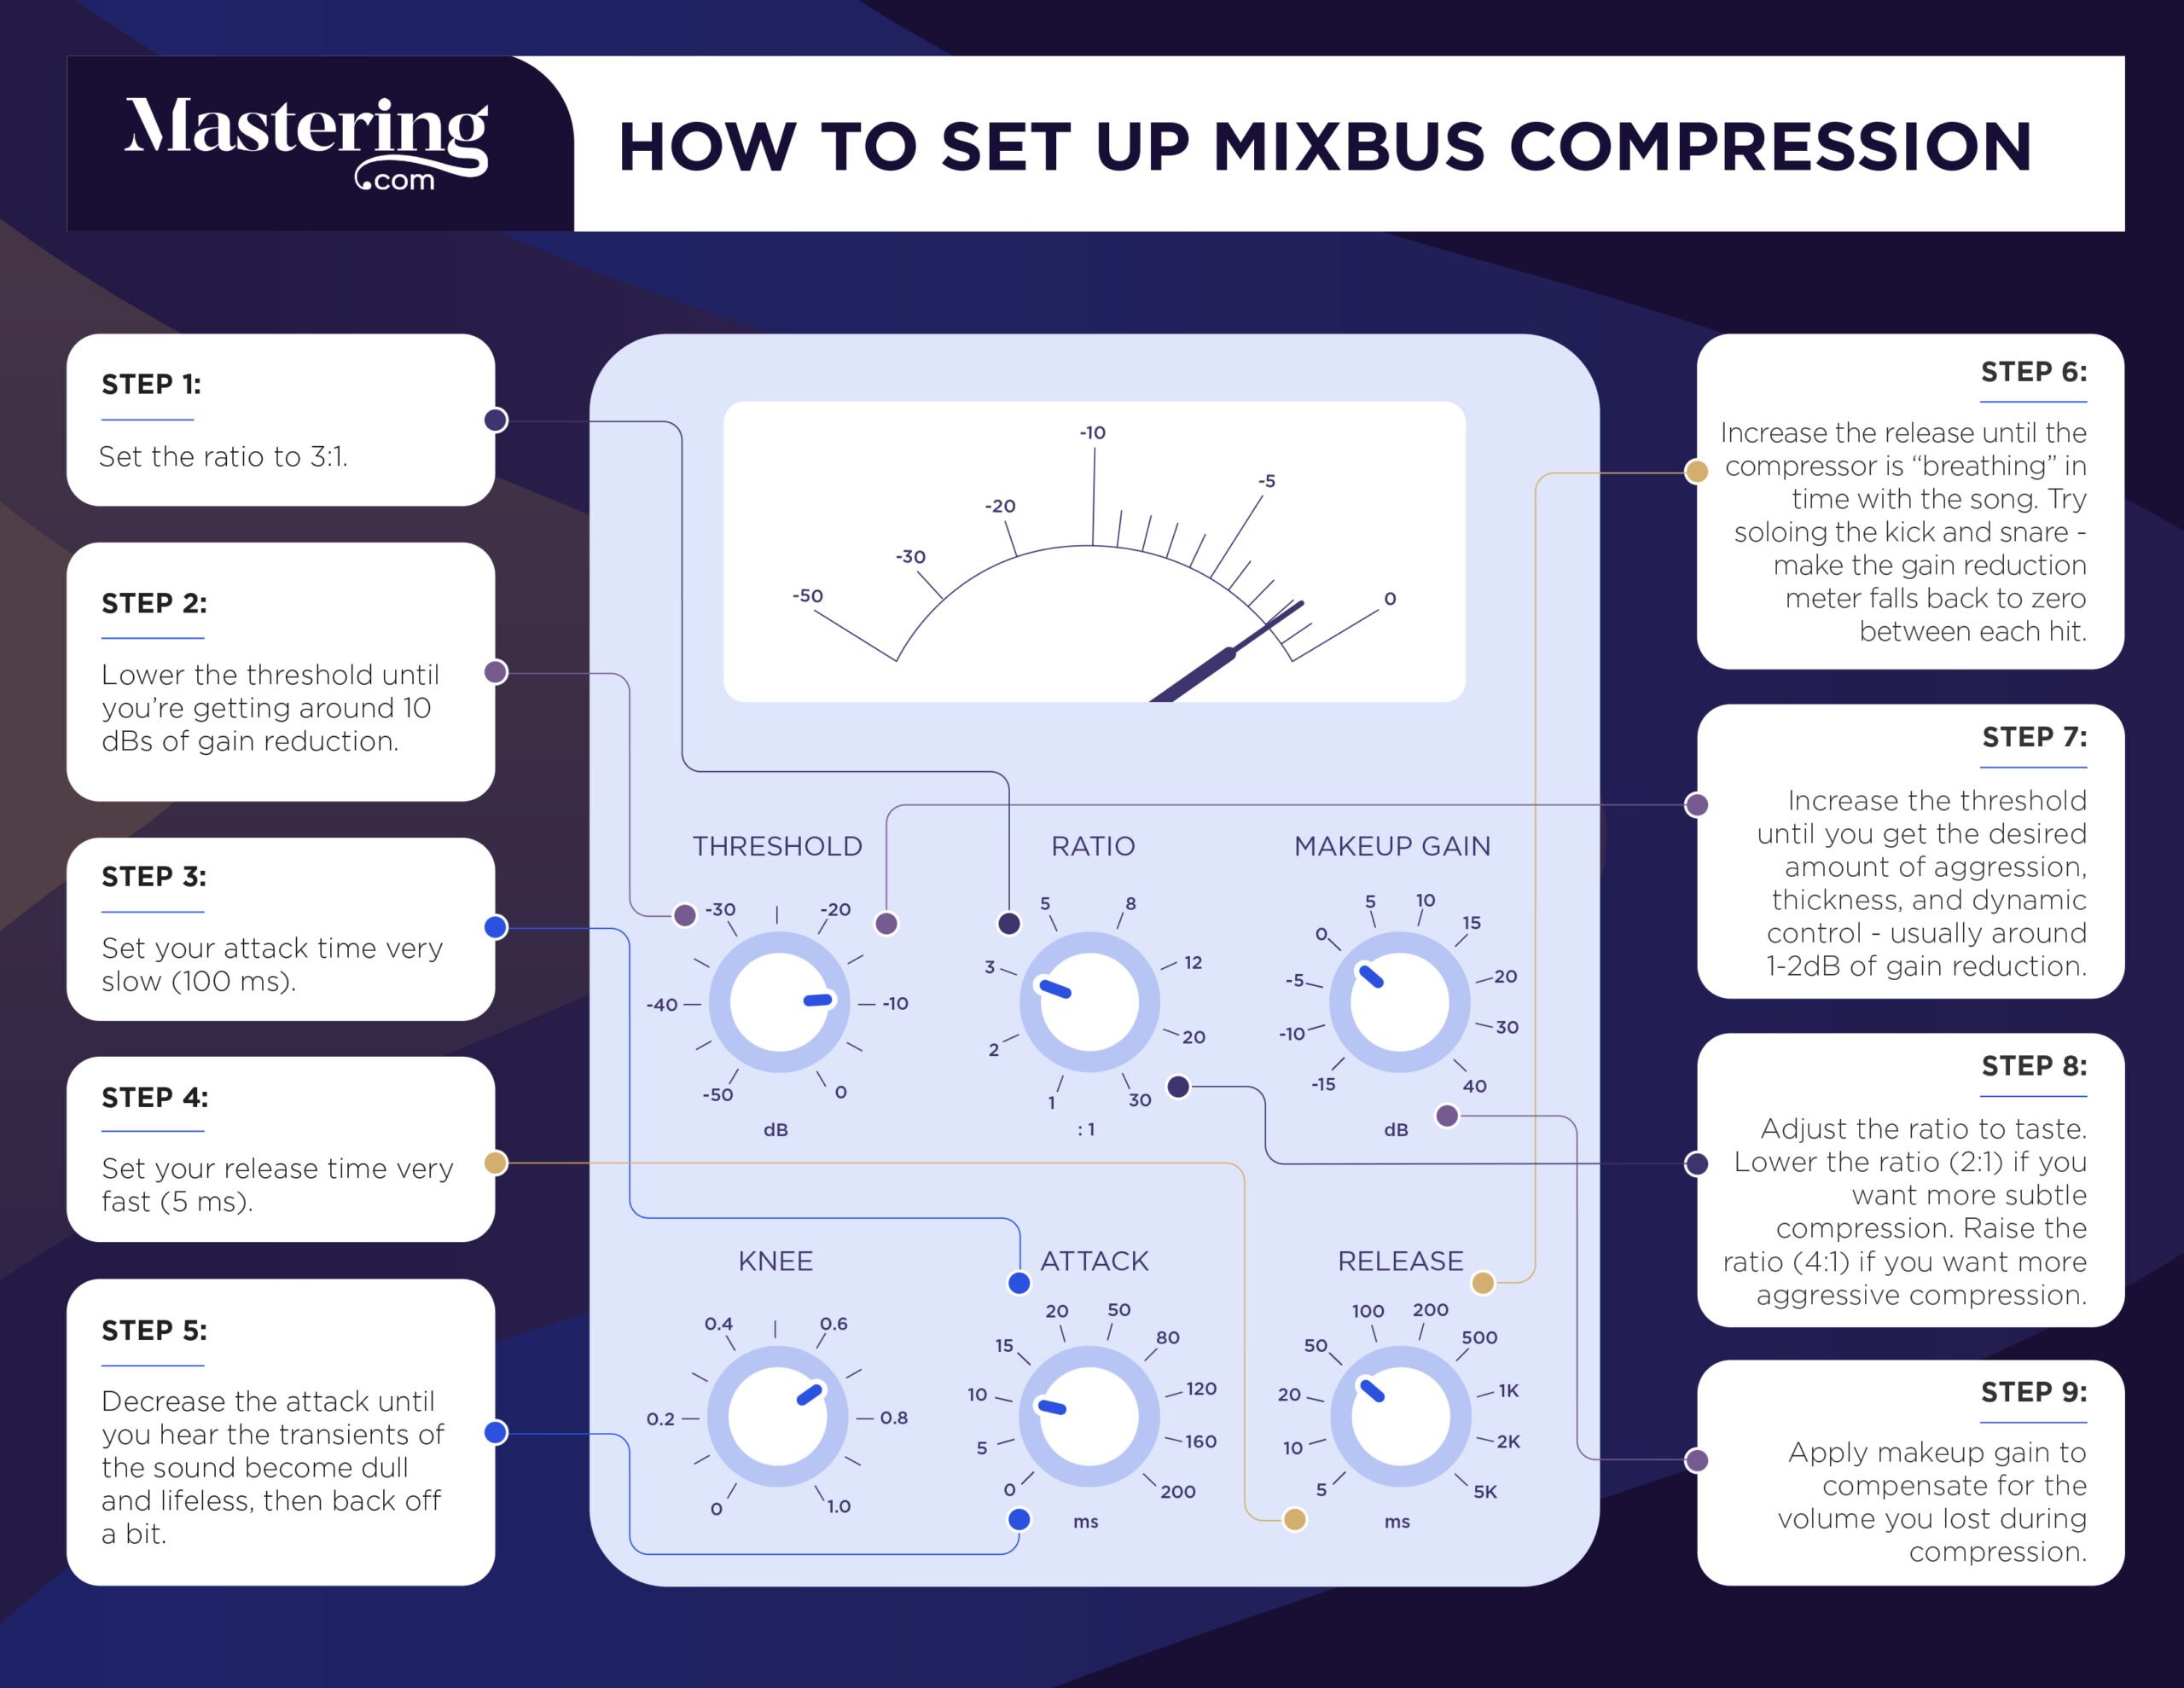
You don’t want that much compression at all. 1-2dBs of gain reduction is plenty. You shouldn’t go any higher than 3dB.
This is getting applied to the entire track, so a little goes a long way.
Air on the side of caution with your attack time. Too fast, and you could make the entire song sound dull. Start your attack around 10ms, and tweak it from there. If it’s a faster song, move it up a tad. If it’s slower, move it down.
For your release time, use your auto-release function if you have it. That will most likely produce the most natural sound. If you don’t have that ability, start your release time around 150ms and tweak from there.
The game here is subtlety. Small moves make more difference here than they do in a mix.
Use your ears! If things start sounding too dull or too aggressive, you’ve gone too far.
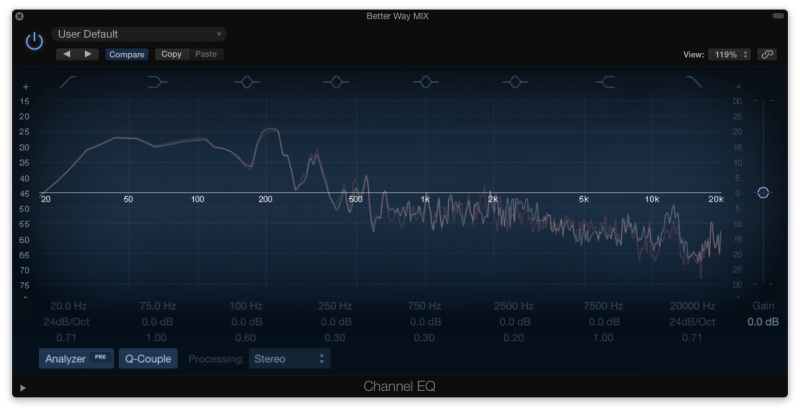
Step 10: Fix the Tone.
The next step is to get the tone of your song balanced with your references.
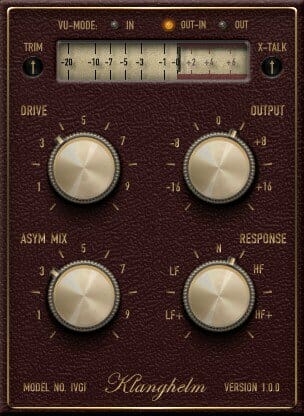
Your primary tool is going to be EQ. Make sure to use a linear EQ if your DAW has one. These are EQs that are made primarily for affecting multiple instruments at once. They’re extra “clean”, and they’re perfect for mastering in the box.
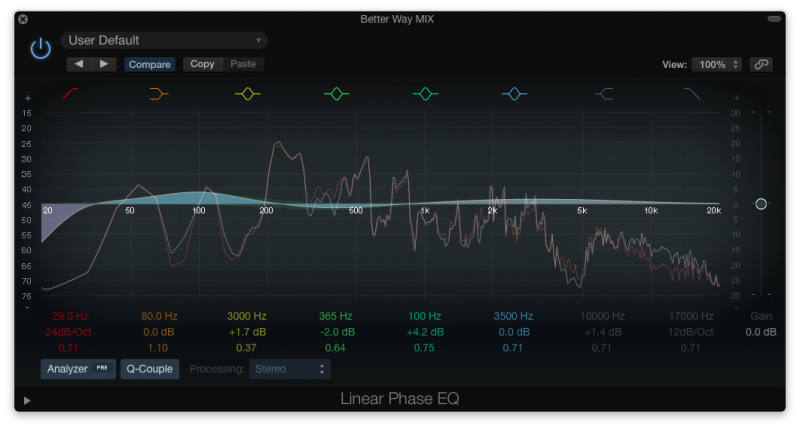
Go back to your notes. What did you write down that needed to be fixed? More top end? More low end? Less mud?
Use your linear EQ to shape the tone of the song to solve those problems.
With mastering, you want to use wide cuts and boosts. During mixing, narrow cuts tend to be more common. But that goes out the door when it’s applied to the entire song.
Try not to boost/cut more than 3dB. Your moves while mastering need to be subtle. Massive changes will change the very foundation of your mix.
Sometimes a slight High Pass Filter can be good, if you are feeling too much sub-bass energy in the song. I would caution against using a Low Pass Filter, however. That could make the song sound muffled and dull.
Our other main tool for this step is multiband compression.
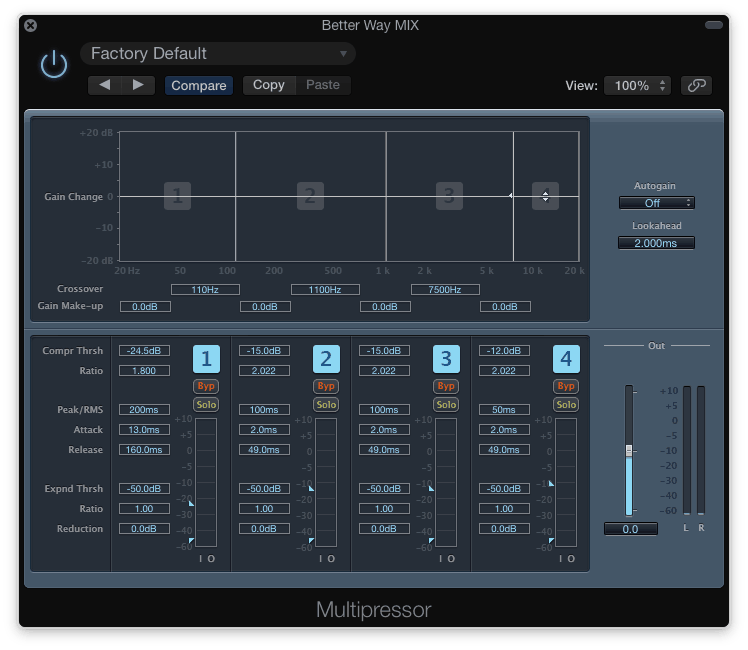
Let’s say that after you finish your EQing, the verses are perfectly balanced. But the chorus still has too much low end thump, and it overpowers the vocals.
If you were to simply cut more of the bass using your EQ, that would fix the problem in the chorus, but your verses would suffer.
Enter multiband compression. Basically, it has the ability to compress only a specific frequency range, rather than compressing the entire track. When you’re trying to fix tones that are inconsistent throughout the song, this tool is for you.
A multiband compressor works the same way as a regular compressor. You still have your threshold, ratio, attack, release, and makeup gain. Nothing is different.
You just have to set the range of frequencies you want it to act on.
If I was trying to fix an inconsistent low end for example, I would set my range for 20Hz-150Hz and shoot for 2-3dBs of gain reduction. You don’t need too much, because you want it to just be applied to the inconsistent parts, not the entire song.
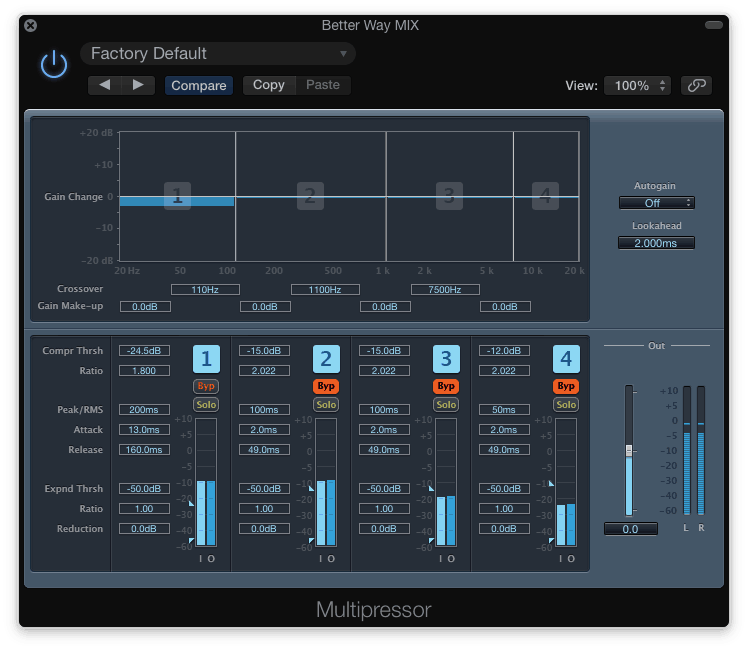
A few words of warning regarding multiband compression:
- You don’t want to use any makeup gain when you are using a multiband compressor to fix issues. Compression naturally turns loud sounds down. But when you use makeup gain to put the track at the same volume level as before, you are actually doing the opposite – turning the soft sounds up. If your goal is to make certain parts of the frequency spectrum quieter, then adding makeup gain will do the opposite of your intention.
- Unless the mix calls for it, don’t use more than one band. Otherwise you can cause more problems than you solve.
- Multiband compression is a powerful tool. It’s not always necessary when mastering. Use it carefully, and use it only when needed!
Step 11: Enhance the Mix.
Now that we’ve balanced the song dynamically and tonally, we can add a few enhancements.
Before we get started: These are OPTIONAL. If you mix doesn’t call for it, don’t use it. Always a good rule of thumb.
The first enhancement you could use is saturation. This could be a saturation plugin, a tape emulation, or an exciter. They’re all variations of the same concept.
Saturation can be used to add a little “color” to the mix. It makes the mix feel a little fuller, a little more intense, a little more exciting. It’s great if your mix is still feeling a little thin or underwhelming.
It can easily do more harm than good, though. Oversaturating your mix will add distortion and take away some of the nuance and dynamics of the mix. It can potentially make the mix sound flatter.
So don’t add it unless you need it. As with all of these: a little goes a long way!
Another enhancement option is stereo widening. This tool helps the song to sound wider and more separated than before.
It’s great for when the mix sounds clustered or close together. Stereo widening can help spread sounds apart, or it can make the mix sound “larger than life.”
HOWEVER, it can also introduce phase issues into the mix, which means that every time the song was played in mono, it would sound even worse than before.
So to repeat: So don’t add it unless you need it. A little goes a long way!
You can learn more about stereo widening in this video:
Finally, volume automation can help to increase the impact of certain sections of the song. For example, you could automate the volume of the song to where the final chorus sat at 0dB, but the rest of the song was at -1dB.
Small increases and decreases in volume are fairly obvious in mastering, so don’t do more than 2dBs of automation. Make sure to tweak the slope as well. You want the increase to sound natural, not abrupt.
Step 12: Limit It.
This is one of the most important steps to mastering. Limiting is the process of making the mix louder – as loud as everything you hear on the radio.
We mentioned earlier how important volume is to a mix. The quieter a song is, the duller and thinner it sounds to our ears. So we want to make sure that our song is the same volume as others in the genre.
Now, if you were to just turn the volume of a mix up, you would cause it to clip. You’d be getting more volume, but you wouldn’t be getting more “perceived volume,” which is when the song feels louder to the ear than it actually is. You’d also be causing distortion, which will make the song sound worse!
Limiting your mix brings the volume of the track up while also creating more perceived volume. It’s the best way to set your song to industry loudness levels.
A limiter is essentially a simple compressor. But rather than having a regular ratio (like 2:1 or 3:1), it has what we call a “brick wall” ratio – ∞:1.
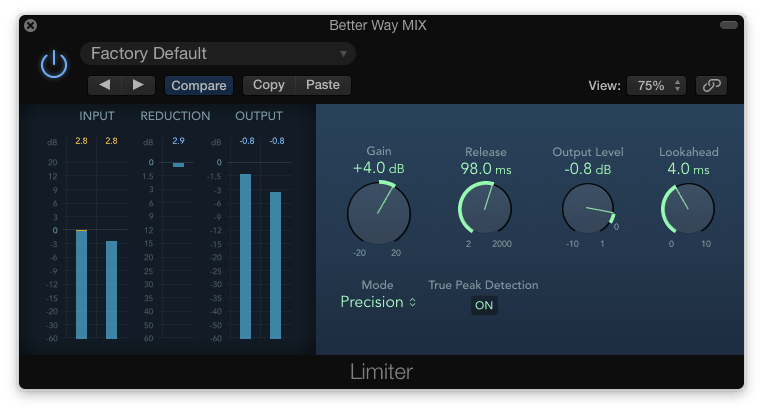
This means that NO amount of sound goes above the set threshold. 100% of it gets turned down. So no clipping.
Here’s how you set up your limiter:
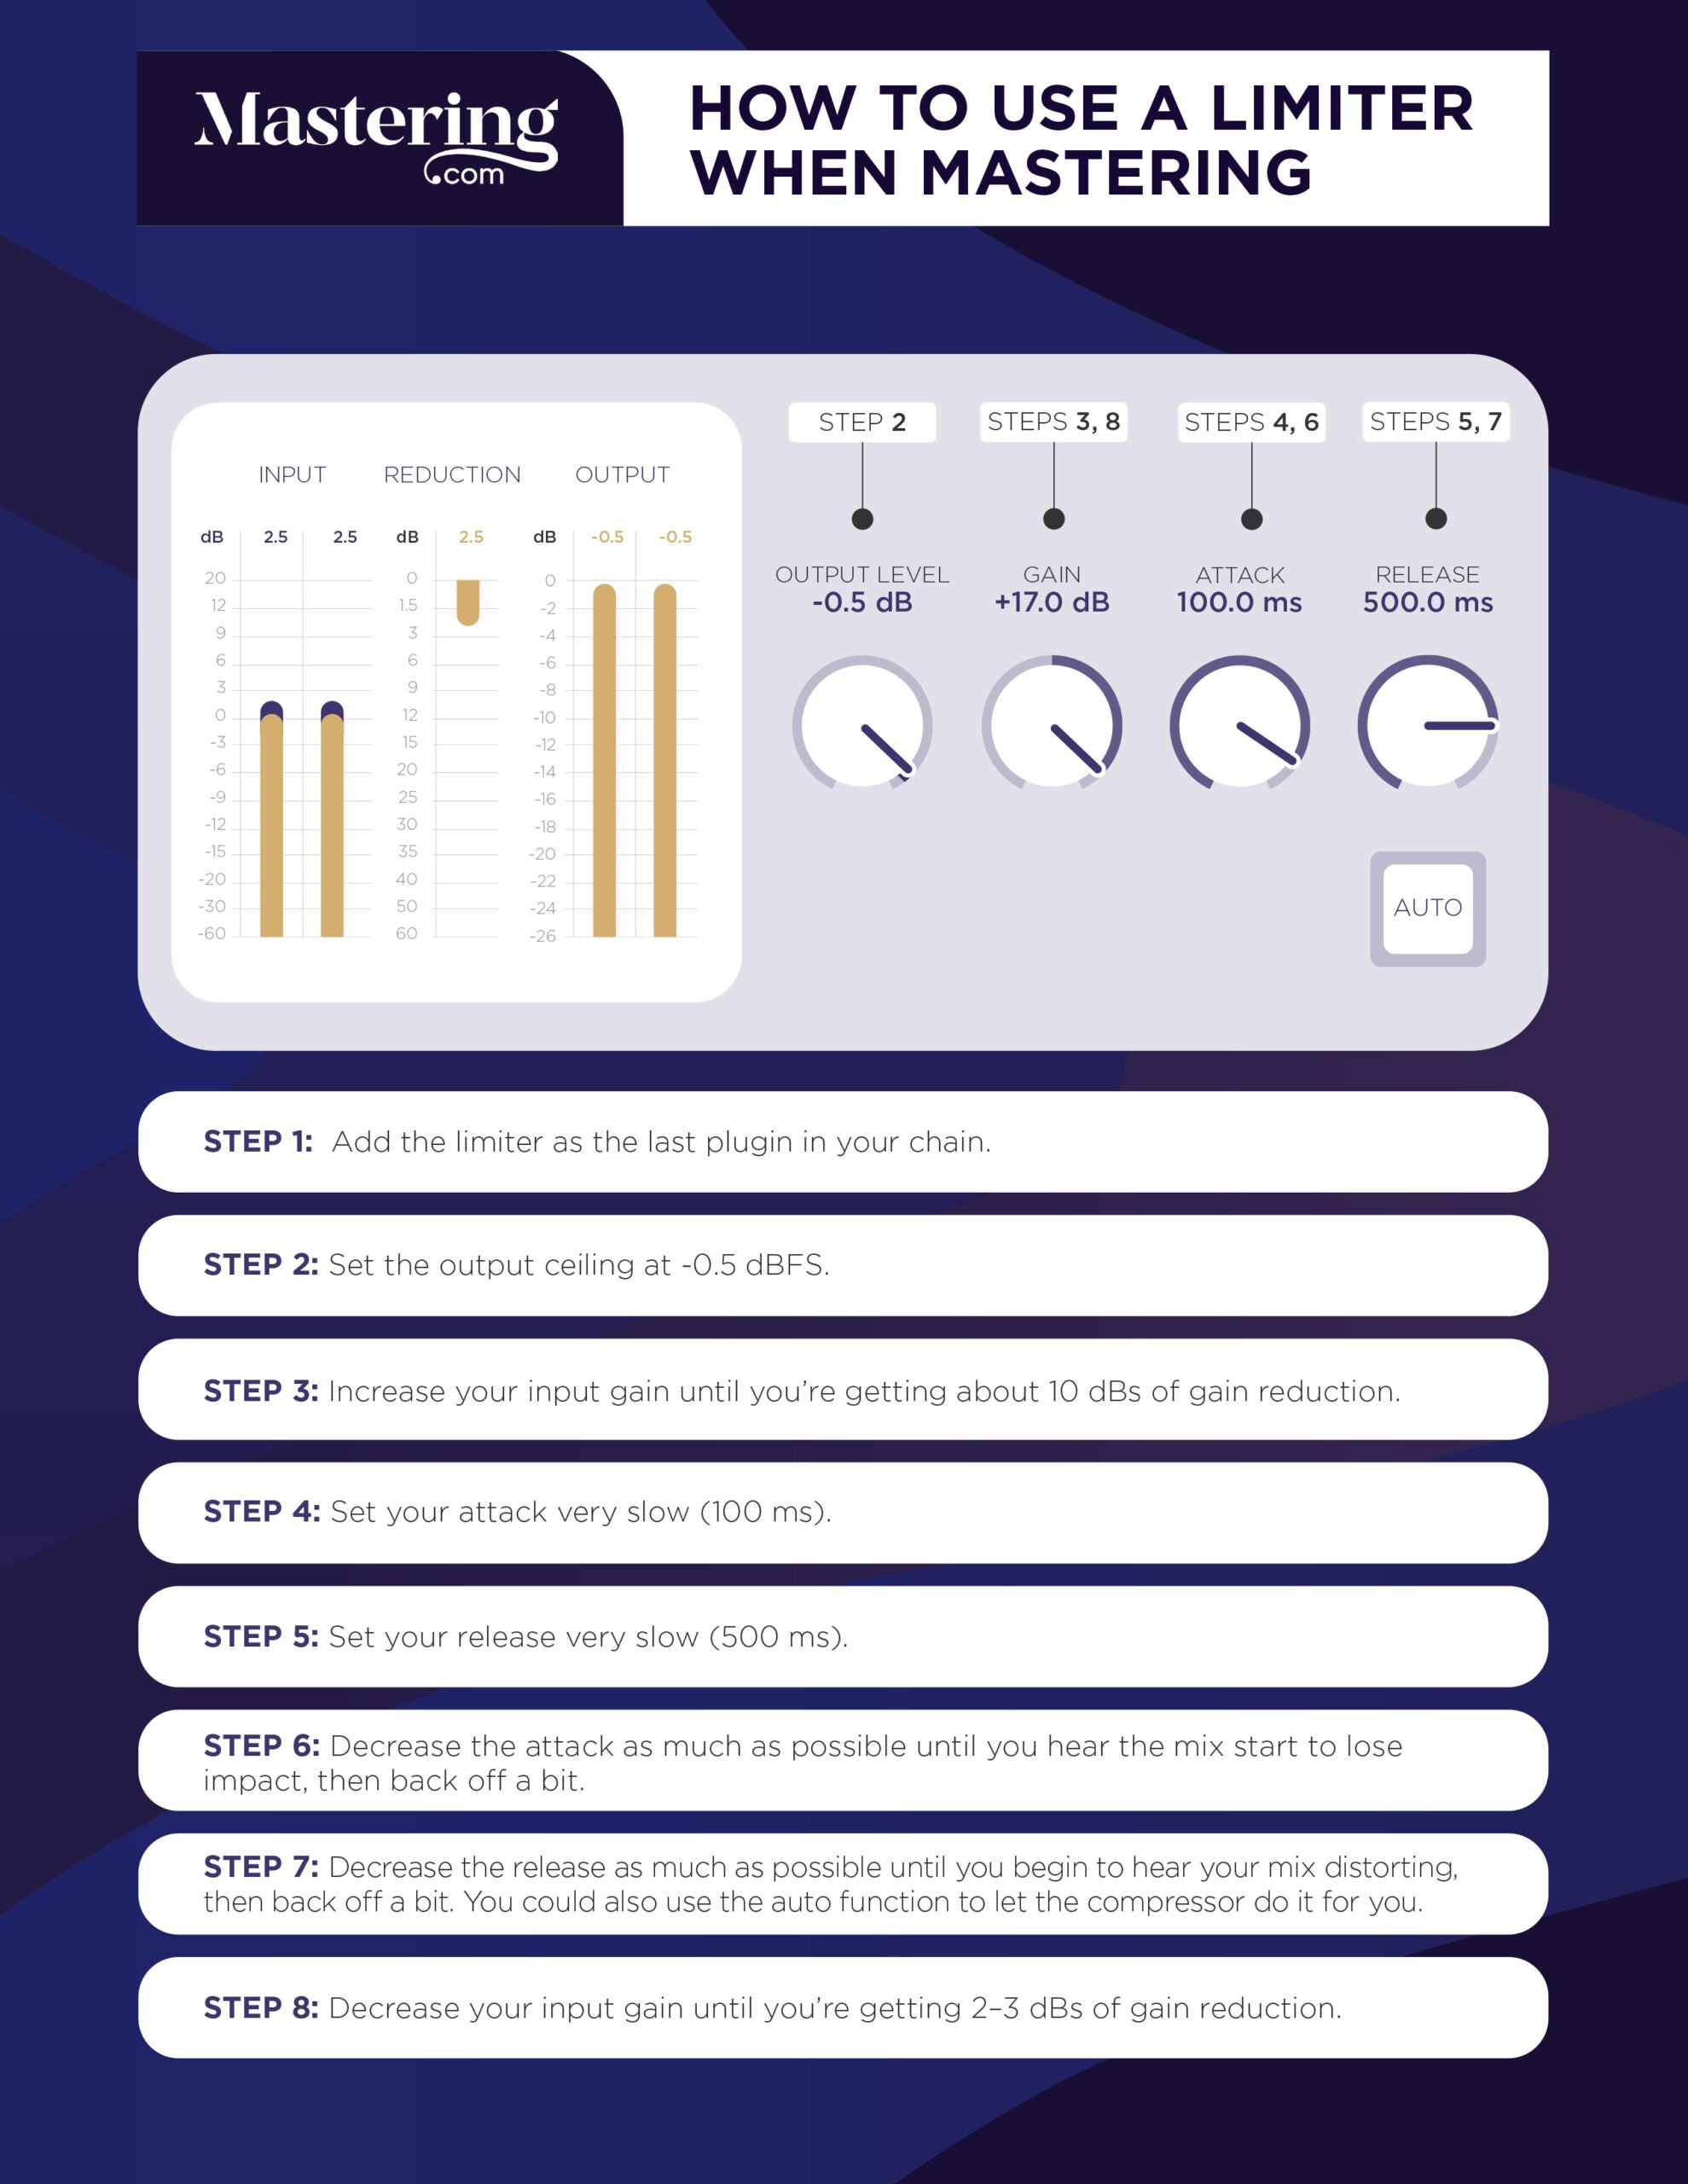
We are wanting our track to sit around 0dB, so the first thing to do is to set your output level (the limiter version of a threshold) around there. Specifically, you want to set it between -0.3dB and -0.8 dB. That will make sure that it doesn’t clip in speakers that have a bit of a gain boost built into their circuits.
After that, you want to turn the gain of the song up until you are getting 2 – 3dB of gain reduction. If you are using a stock limiter, don’t go any higher than that, because it can create some nasty artifacts. If you are using a quality third-party limiter, you can go a little higher to 4 – 5dBs of gain reduction.
The gain knob is increasing the actual volume, but the brickwall limiting is increasing the perceived loudness. So your track is loud, but it feels even louder.
Step 13: Make Your Final Checks.
Congrats! You’re nearly there. Now it’s time to make any final checks.
Personally, I use Dynameter to check the track still has a high dynamic range.
Other people like to use a LUFS meter to check the final loudness level.
If you don’t have any specific plugins for these purposes, skip this step. At this point in time, you’ve already done everything in your power to ensure that this is a great master.
UPDATE: We released another video that gives you 6 steps for mastering:
Step 14: Bounce It (at 16 bits and 44.1kHz).
This is it. The master is done, and you’re about to release it to the world!
The final step is to bounce (export) the song in a file that will be compatible with all types of playback systems.
First things first: Select for the track to be bounced as both a lossless file and a .mp3 file. You can pick whatever lossless type you prefer – .wav, .aiff, .caf.
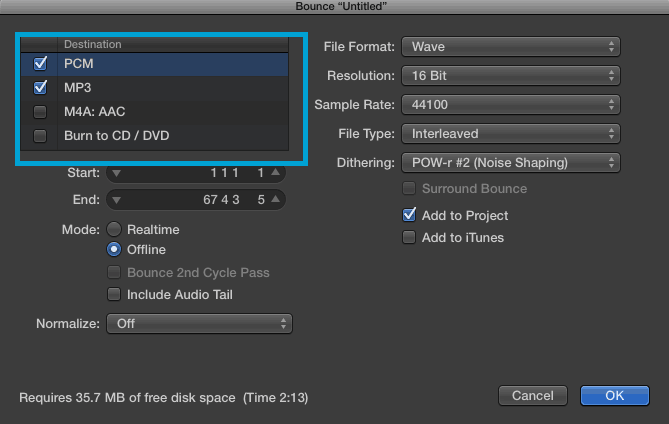
Then you’ll want to make sure the track is bouncing at resolution of 16 bits and a sample rate of 44.1kHz. These are the standards for audio.

One very important detail: make sure to dither your track before you bounce. Without getting into the science, dithering helps to prevent extra distortion from happening when you are bouncing your track at a different resolution. Without it, your hard work would go to waste.
Your DAW will most likely have different dithering options. I recommend using the pow-r 2 setting.
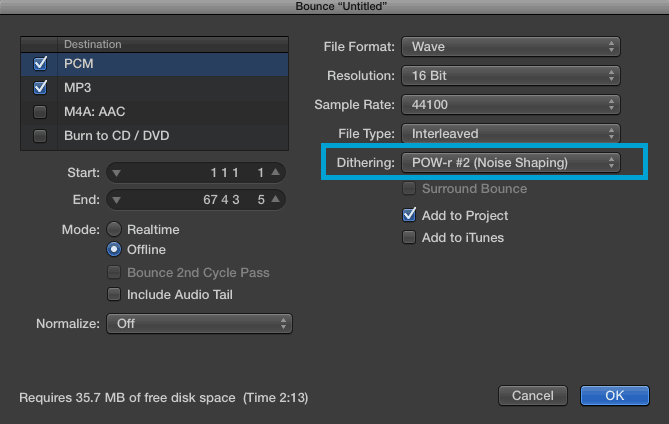
IMPORTANT: Make sure to only dither your audio file once! You can cause audible noise if you dither multiple times.
Finally, if there is any “normalizing” function in your DAWs bounce window, DON’T use it. Normalizing is essentially a crude way to make your track louder. You don’t need it once you’ve mastered your song.

Hit that OK button, and you are done mastering!
Wrapping Up
Congrats! You’ve just learned how to master your own music.
Here’s a summary of the steps you’ll need to take when you master your mix:
- Optimize your listening space.
- Finish your mix (to sound mastered).
- Check the levels.
- Bounce down your stereo track.
- Take a break (of at least a day).
- Create a new project and import your references.
- Listen for the first time (and take notes).
- Make a full analysis.
- Control the Dynamics.
- Fix the Tone.
- Enhance the Mix.
- Limit it.
- Make your final checks.
- Bounce it (at 16 bits and 44.1kHz).
So, now you know how to master your music.
Next Steps
Although this isn’t a short post, we’ve only scratched the surface.
If you’re sick of not being able to translate the sound you have in your head to come out of the speakers the way you want…
And you want to finally reach industry-standard quality in your music by becoming a professionally trained mastering engineer…
Watch this next:
Enjoy!


