


One of the most iconic effects in music is the reverse reverb.
You’re listening to a song, and all of a sudden there’s a ghostly swell. It builds and builds until it’s about to explode… then the vocals come in.
Chills, right?
Today we’re going to cover what the reverse reverb is, how to make it in your mix, and why you should be using it in your songs TODAY.
I’m guessing you’re here because you want to make your mixes sound professional. We put together a brief training that covers a totally new approach to music production. Until now, everyone has been teaching production totally backward. Just click below to watch.Get industry-quality every time (steal this framework)
But if you just want to learn all about Reverse Reverb specifically, keep reading.
Reverse Reverb
(Skip to 14:02 for the section on reverse reverb)
What is Reverse Reverb?
![]() To put it simply, it’s reverb that swells in BEFORE an instrument begins to play
To put it simply, it’s reverb that swells in BEFORE an instrument begins to play
Here’s some examples I’ve made for you:
Sounds cool, right?
It feels ghostly, but somehow natural.
Why Would You Use Reverse Reverb?
It’s a great way to lead into new sounds.
It comes in before any notes even start, making it a cool songwriting trick. The reverb becomes a part of the composition itself.
It gets the listener ready for the sound that’s about to come. Reverse reverb builds anticipation, giving the sound even more of an impact when it hits.
It’s a fantastic way of adding some mystique and intrigue to your song. If your arrangement feels a little empty or the vocal needs more “umph” when it comes in, then give this technique a shot.
How Do You Create A Reverse Reverb?
The process seems complicated at first glance, but it’s actually very simple.
It all comes down to three easy steps.
Step 1: Reverse the Vocal
First things first, we need to reverse the vocal recording itself.
I’m working in Logic Pro, so if you’re using a different DAW make sure to Google this phrase: “How to reverse an audio file in [insert your DAW here].”
First, select your vocal track and open up the Audio Editor window.
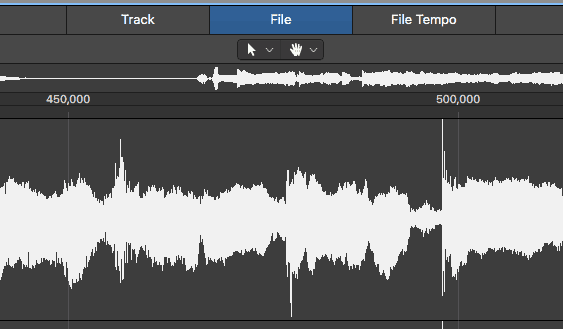
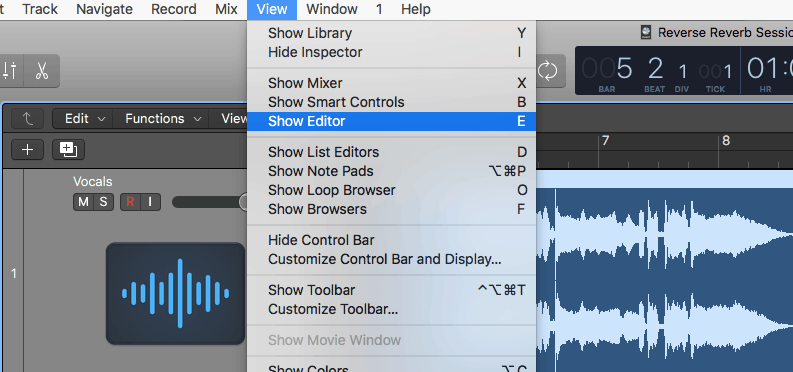 After that, click on the “File” editor.
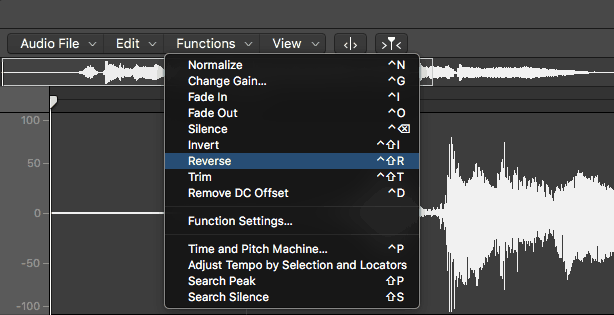
 Then, under the “Functions” menu, click “Reverse.”
 That should reverse your vocals. Give it a listen – they should sound really weird!
Luckily, this is a non-destructive edit. That means you can reverse the audio file back at any time you’d like. So don’t stress about ruining any of your hard work.
Step 2: Add Reverb to the Reversed Vocal
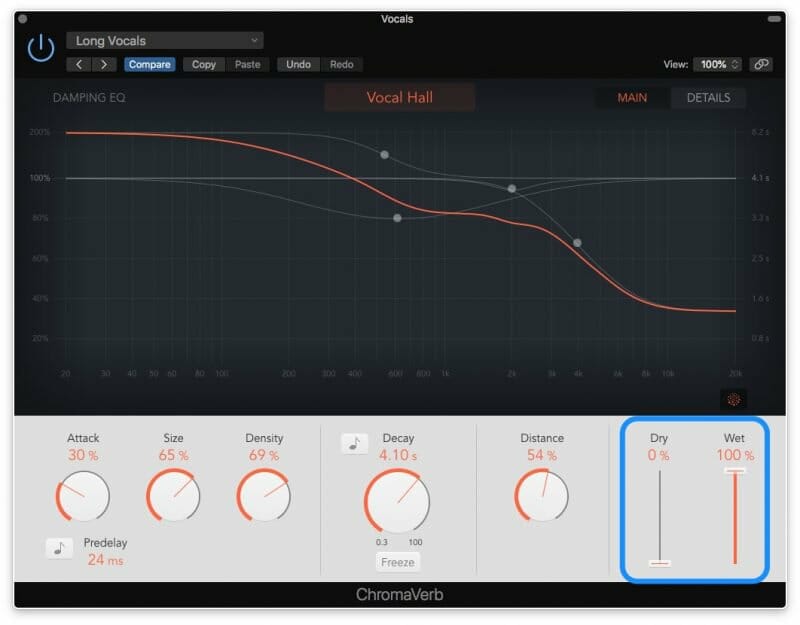
Next, add reverb to your newly reversed vocal.
You want to give it a large decay time. Probably somewhere between 2-5 seconds.
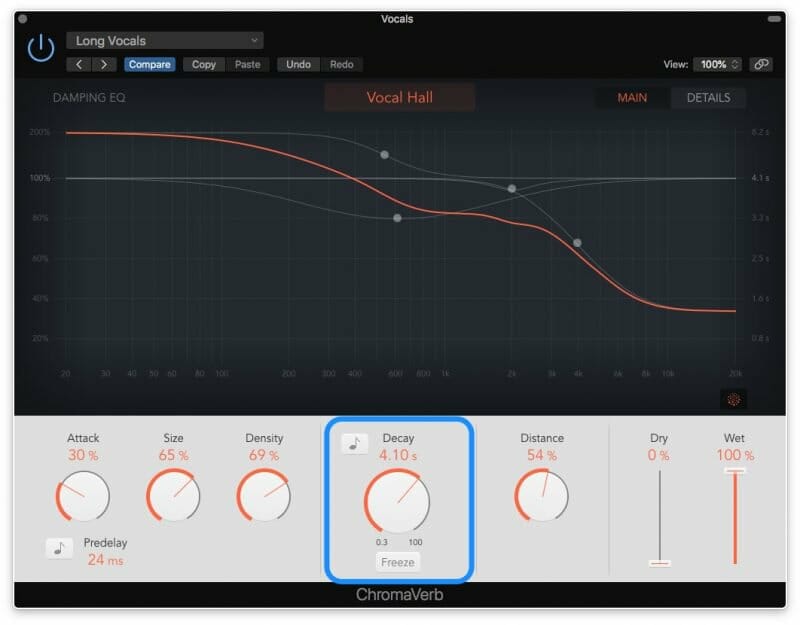 This decay time is important.
You don’t want it to be too long, or the fade-in will be too slow.
You don’t want it to be too short, or the fade-in will be really fast.
Tweak it until it sounds right to your ears. Remember – you can always go through this process again if you want a different decay!
Don’t forget to set the wet/dry balance to 100% wet. We don’t want any of the original signal coming through.
 Now we have to record the reverb to its own channel so that we can manipulate it.
First, create a send on the vocal to a new bus.
Then, create a new audio track, and set the input of that blank track as the bus from the vocal channel.
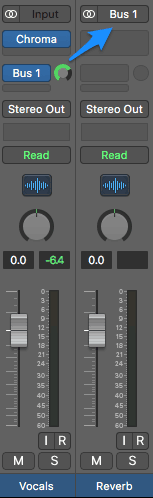
Next, record arm the blank audio track and hit record.
 That should save the reverb sound as its own audio file.
Finally, go back to the vocal channel and bypass the reverb plugin and the send. Then return to the edit window and reverse the audio file back where it was.
Step 3: Reverse The Reverb Itself
Now we’re going to go through the same steps as Step 1, but on our new reverb audio file.
Select the reverb file and bring up the Audio Editor.
After that, click on the “File” editor.
Then, under the “Functions” menu, click “Reverse.”
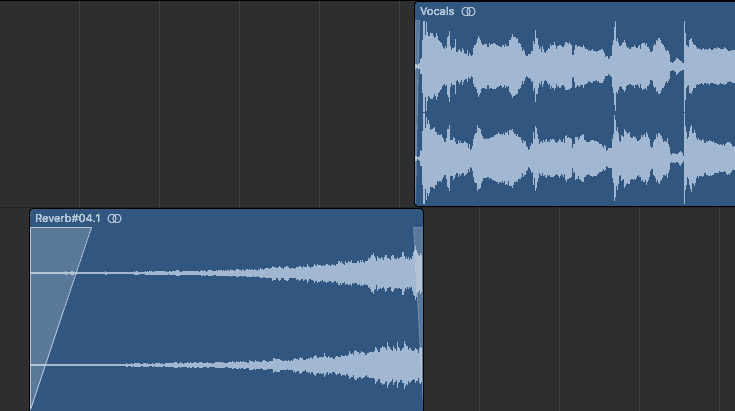
That should reverse your reverb.
Next, we’re going to trim the edges of the of the sound file to only include the lead-in to the first word of the phrase.
 After that, add some small fades to keep your speakers from popping when it comes in and out.

Then, line up the transient of the reverb with the transient of the first word of the phrase.
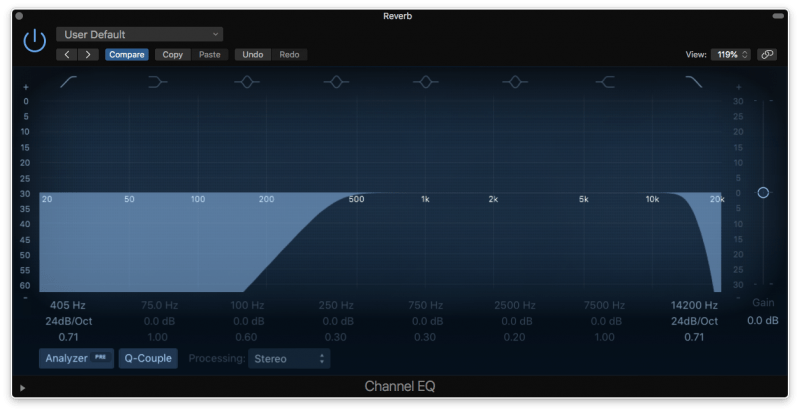
 Finally, shape your reverb channel with some EQ. Cut the lows or the highs, depending on the tone you’re going for.
That’s it! Hit play and tweak your placement of the reverb so it lines up perfectly with the word.
You now have your own reverse reverb to lead into your song.
Conclusion: Reverse Reverb
Now that you know how to create a reverse reverb, brainstorm some creative ways to use it.
Maybe to lead-in to a new drum part?
Maybe a guitar riff that comes in after the melody?
Maybe make a really long reverse reverb and use it as a pad underneath your arrangement.
There’s dozens of possibilities. Go try it out for yourself now.
Next Steps
If you want to dig deeper into music production and learn what it actually takes to make mixes that sound pro…
And you’re an intermediate or advanced producer…
Be sure to check out the free masterclass:
Enjoy!


